

Before You Start: Essential Preparation for Arc Lamp Assembly
Assembling your new arc floor lamp doesn’t have to be complicated. With proper preparation, you can ensure a smooth assembly process and avoid common pitfalls. Taking a few minutes to prepare will save you time and frustration later.
Safety should be your first priority when working with any lighting fixture. Make sure you’re assembling your lamp in a well-lit area away from water sources. Never attempt to connect electrical components while the lamp is plugged in, and always check wires for damage before completing assembly.
Most arc floor lamps require minimal tools for assembly. Typically, you’ll need:
– Phillips or flathead screwdriver
– Allen wrench (often included with the lamp)
– Clean cloth for handling delicate parts
– Clear, spacious work area
When unpacking your lamp, do so carefully and methodically. Remove all components and arrange them in the order you’ll need them. This approach helps identify any missing parts early and creates a visual assembly sequence. Comprehensive preparation for your arc lamp assembly greatly reduces the chances of mistakes.
Before diving into assembly, take a moment to inventory all parts against the manufacturer’s list. Typical arc lamp components include:
– Base (weighted for stability)
– Pole sections (straight and curved)
– Lamp head/socket assembly
– Lampshade
– Hardware (screws, nuts, washers)
– Assembly instructions
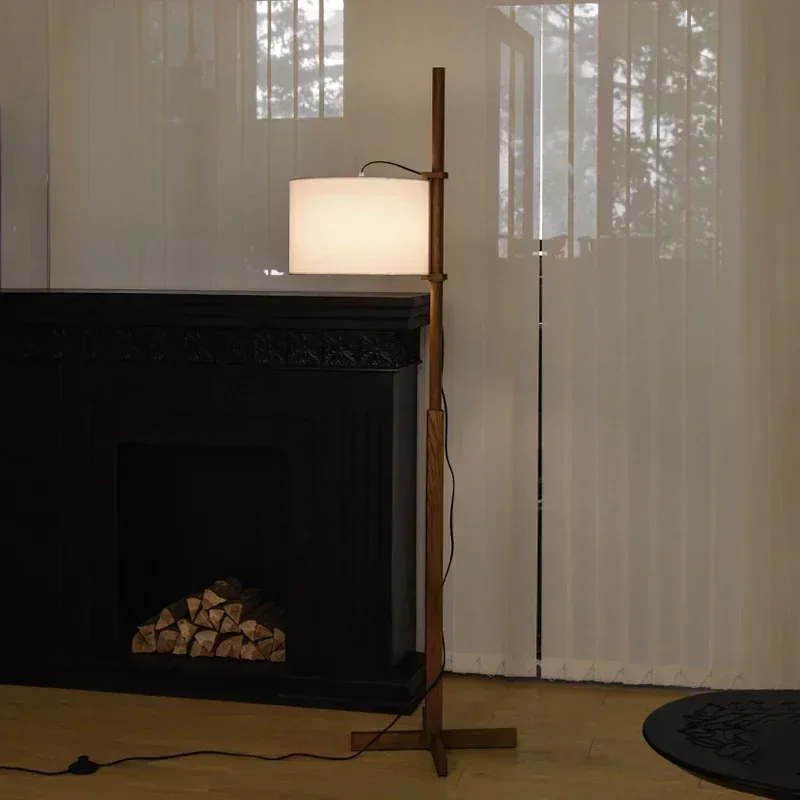
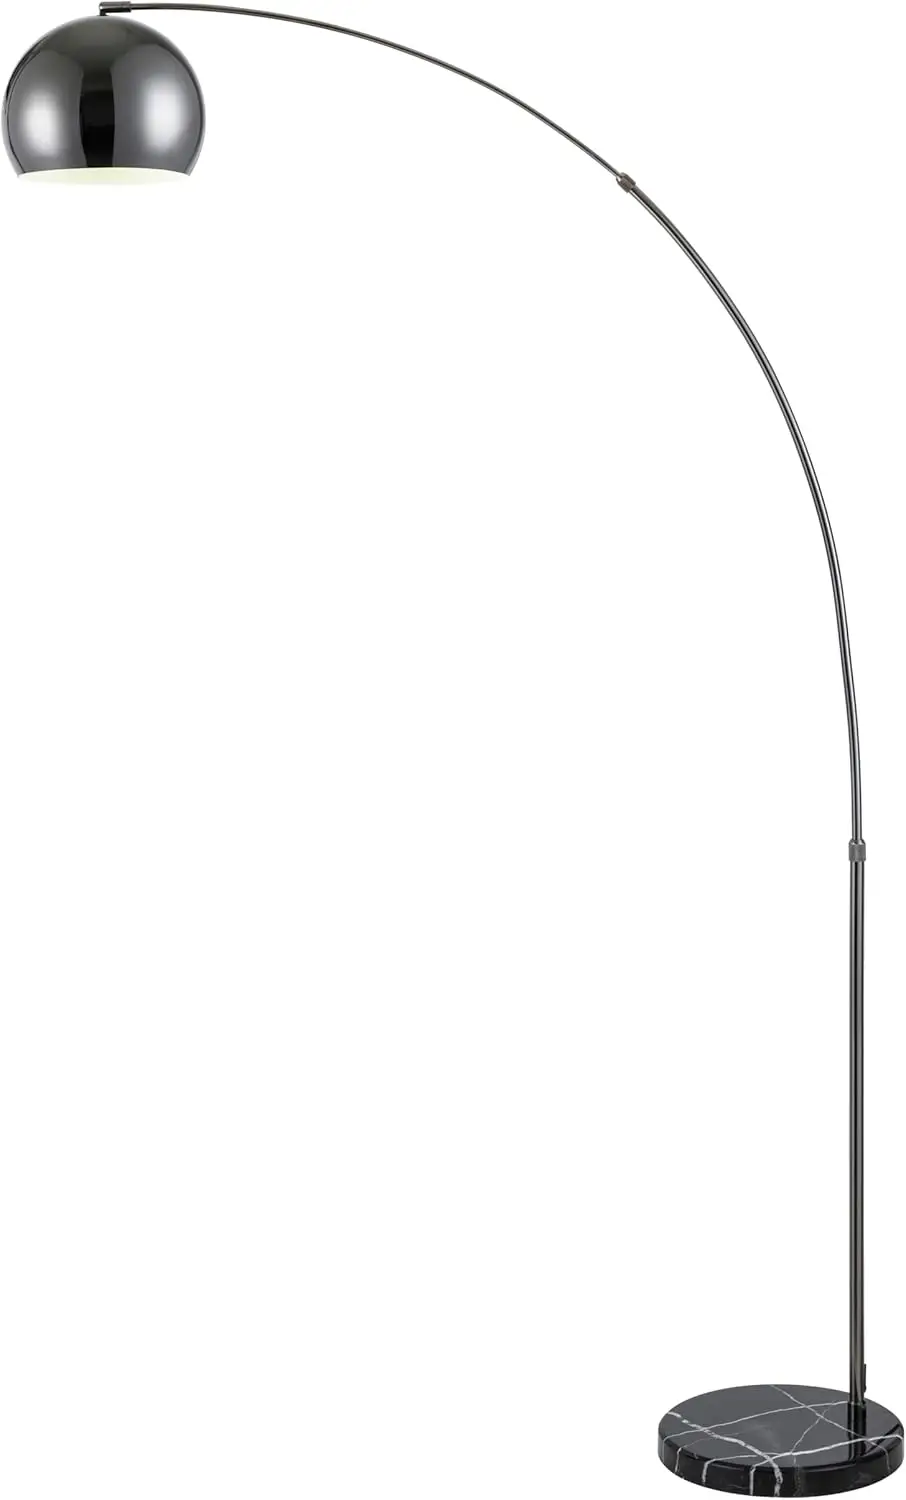
Different marble base arc floor lamp styles may have unique components that require special handling. Marble bases are particularly heavy and should be unpacked and positioned with care to avoid damage to both the base and your flooring.
Review the manufacturer’s instructions completely before starting. Even if you’ve assembled lamps before, each model has its own specific requirements and sequence. Familiarizing yourself with the process first will help you anticipate challenges and work more efficiently.
Step-by-Step Arc Floor Lamp Assembly Instructions

Assembling the Base and Support Structure
The base is the foundation of your arc floor lamp, providing stability and support for the entire structure. Getting this part right ensures your lamp will stand securely without wobbling.
Start by identifying all base components. Most arc lamps feature either a circular weighted base, a marble slab, or a cross-base design. Lay out all pieces on a flat surface and locate the attachment hardware.
For weighted circular bases:
1. Place the base plate on the floor with the flat side down
2. Locate the central mounting hole or bracket
3. Attach any decorative cover plates if included
4. Position the first pole section to align with the mounting bracket
5. Insert and tighten screws or bolts securely
For marble bases:
1. Position the marble base on a soft surface to prevent scratching
2. Locate the metal mounting bracket (typically pre-attached)
3. Align the bottom pole section with the mounting bracket
4. Secure using the provided fasteners, being careful not to overtighten against the marble
Proper perfect base stability is crucial for arc lamps, especially for models with extended arcs. The counterweight principle works only when the base is correctly assembled and positioned on a level surface.
After attaching the base to the first pole section, check for stability by gently pressing on different sides of the base. It should not rock or tilt easily. If you’re assembling large oversized arc floor lamps, pay extra attention to base stability, as their extended reach creates more leverage that can cause tipping if not properly secured.
Connecting Multiple Pole Sections
Many arc floor lamps feature multiple pole sections that must be connected to create the lamp’s distinctive curved shape. This assembly requires attention to detail to ensure secure connections and proper wire placement.
Start with the pole section attached to the base and work upward:
1. Identify the next section in the sequence (poles are often numbered or sized to indicate order)
2. Before connecting, check for any electrical wires that need to be threaded through
3. Align connection points, which may be threaded or feature a push-and-twist mechanism
4. Join sections by turning clockwise or using the locking mechanism specific to your model
5. Continue adding sections in sequence until the arc is complete
For lamps with electrical wires running through the poles, maintain gentle tension on the wire from both ends as you connect sections. This prevents pinching or kinking the wire inside the poles.
Adjustable arc floor lamp models require special attention during this phase. These lamps typically feature specialized joints, tension knobs, or telescoping sections that allow for height or angle adjustments. Make sure these mechanisms move freely during assembly but can be tightened securely when positioned.
When working with curved sections, align them so the arc forms a smooth, continuous curve. Misaligned sections can create an unbalanced appearance and potentially compromise stability. Tighten all connections fully but avoid over-tightening, which can strip threads or damage components.
Managing Electrical Components and Wiring
Proper handling of electrical components is crucial not only for the functionality of your arc floor lamp but also for safety. Most arc lamps have wiring that runs through the pole sections from the light socket to the base.
When threading wires through pole sections:
1. Never pull wires sharply or with excessive force
2. Guide wires gradually through each section before fully connecting poles
3. Ensure there’s enough slack at connection points to prevent strain
4. Check that wires aren’t pinched or crimped at joints
Socket assembly typically involves connecting wires to the socket housing at the end of the arc. Follow color-coding carefully (usually black to black, white to white) when making these connections. If your lamp has a socket that’s already wired, you’ll simply need to ensure the wires are properly positioned as you attach the socket to the pole end.
Effective cord management in arc floor lamps improves both the appearance and safety of your lamp. Most designs allow the cord to exit near the base, where it can be positioned discreetly. Some models include clips or channels to secure the cord along the pole.
LED arc floor lamp models may have additional components like drivers or transformers that need to be properly positioned during assembly. These components are typically housed in the base or lower pole sections and may require special wire connections.
Always remember these electrical safety precautions:
– Never connect the lamp to power until assembly is complete
– Check for exposed wires or damaged insulation before use
– Ensure all wire nuts or connectors are securely fastened
– Keep connections dry and away from metal components
Finishing Touches: Shade Installation and Final Adjustments
Properly Attaching the Lamp Shade
The shade is both a functional element that directs light and a design feature that defines your lamp’s appearance. Proper installation ensures even lighting and a finished look.
Different arc lamp models use various shade attachment methods:
For harp mounting systems:
1. Locate the harp (U-shaped wire) that attaches to the socket
2. Secure the harp to the socket base by pressing the ends into the mounting brackets
3. Place the lampshade on top of the harp
4. Secure with the finial (decorative cap) by threading it onto the top of the harp
For socket ring mountings:
1. Remove the socket ring from the socket by unscrewing it
2. Place the lampshade frame directly on the socket
3. Re-attach and tighten the socket ring to secure the shade
Wood arc floor lamp models often feature unique shade attachment systems that complement their natural aesthetic. These may include custom-fitted frames or decorative elements that require specific alignment during installation.
When handling fabric shades, always touch the metal frame rather than the fabric itself to avoid leaving marks or oils on the material. For glass or metal shades, use a soft cloth to prevent fingerprints during installation.
Once attached, check that the shade sits level and centered over the light source. An uneven shade will be immediately noticeable when the lamp is illuminated and can detract from the elegant appearance of your arc lamp.
Bulb Selection and Installation
Choosing the right bulb for your arc floor lamp affects both lighting quality and energy efficiency. Most arc lamps accommodate standard medium-base (E26) bulbs, but always check your lamp’s specifications for maximum wattage and recommended bulb types.
For optimal lighting from your arc lamp:
1. Choose the appropriate bulb type (LED, CFL, halogen, or incandescent)
2. Verify the maximum wattage rating (typically found on a sticker near the socket)
3. Consider color temperature based on your room’s needs (warm white for living areas, cool white for task lighting)
4. Install by gently screwing the bulb clockwise into the socket until secure
Dimmable arc floor lamp models require compatible dimmable bulbs to function properly. Using non-dimmable bulbs in these lamps can cause flickering or premature bulb failure. When selecting bulbs for dimmable lamps, look specifically for “dimmable” on the packaging.
Energy-efficient LED bulbs are ideal for most arc lamps, providing long life and reduced energy consumption. For lamps with exposed bulbs or decorative fixtures, consider vintage-style LED bulbs that combine modern efficiency with classic aesthetics.
Understanding arc floor lamp light output considerations helps you select the right brightness for your space. An arc lamp used primarily for ambient lighting might use a 40-60 watt equivalent bulb, while one used for reading or detailed tasks might need 75-100 watt equivalent.
Making Final Adjustments for Balance and Positioning
After assembly is complete, taking time to make final adjustments ensures your arc floor lamp functions properly and looks its best in your space.
For perfect positioning:
1. Place the lamp in its intended location
2. Adjust the arc direction to provide light where needed
3. Check that the base sits flat and stable on the floor
4. Ensure the shade hangs straight and level
5. Adjust the height if your model allows for it
Finding the perfect arc floor lamp height depends on its primary function. For reading, position the bottom of the shade approximately 40-42 inches above the seat. For ambient lighting, a higher position may be more appropriate to cast light more broadly.
For adjustable arc lamps, familiarize yourself with the adjustment mechanisms before making changes. Some use knobs or levers that must be loosened before changing position and tightened once the desired angle is achieved. Always support the weight of the lamp head while making adjustments to prevent sudden movements that could damage the lamp.
If your arc lamp uses a counterweight system, ensure it’s properly balanced after making any adjustments. An imbalanced arc can put stress on the connections and potentially create a tipping hazard.
Troubleshooting Common Arc Floor Lamp Assembly Problems
Fixing Stability and Balance Issues
Wobbling or leaning issues are among the most common problems with newly assembled arc floor lamps. Fortunately, most stability problems can be easily resolved.
If your lamp is wobbling:
1. Check that all base screws and connections are fully tightened
2. Verify the base is sitting on a level surface
3. Ensure all pole sections are securely connected
4. Adjust any leveling feet if your lamp base includes them
5. Consider adding a thin non-slip pad under the base for additional stability
For lamps that lean despite secure connections, the issue may be weight distribution. The curve of the arc should align with the center of the base for optimal balance. Examples of properly balanced arc lamps for living rooms show how the arc should position directly above the base when possible.
Marble base lamps sometimes appear unstable because the connection between the metal mounting bracket and the marble isn’t tight enough. Check that all washers are in place and that mounting hardware is secure but not over-tightened, which could crack the marble.
If connections between pole sections become loose over time, disassemble those sections and check for damaged threads or connection points. Sometimes adding a small piece of cloth tape to male threading can improve the grip and stability of the connection.
Resolving Electrical and Lighting Problems
Electrical issues in arc floor lamps typically fall into a few common categories that can often be resolved without professional help.
If your lamp isn’t lighting up:
1. Verify the bulb is functional by testing it in another lamp
2. Check that the bulb is fully seated in the socket
3. Ensure the lamp is plugged in and the outlet is working
4. Test the switch for proper operation
5. Examine the cord for any visible damage
For flickering lights, first try replacing the bulb. If flickering persists, check all wire connections inside the socket assembly (with the lamp unplugged). Loose wire nuts or connections are common causes of intermittent lighting.
Socket issues can sometimes be resolved by gently bending the metal tab inside the socket outward slightly to ensure better contact with the bulb base. Always unplug the lamp before attempting this adjustment.
Important safety note: If you encounter any signs of electrical shorts, burning smells, or damaged wiring, stop using the lamp immediately and consult a professional. DIY electrical repairs should be limited to simple connection issues with the lamp unplugged.
Dealing with Missing or Damaged Parts
Finding yourself with missing or damaged components during assembly can be frustrating, but having a plan makes the situation manageable.
If you discover missing parts:
1. Review all packaging materials carefully – small parts may be hidden in protective wrapping
2. Refer to the parts list in your instructions to identify exactly what’s missing
3. Check if the missing component has a part number for easier replacement
4. Contact the retailer or manufacturer with specific details about the missing item
While waiting for replacement parts, avoid attempting to substitute with makeshift alternatives. Improper parts can compromise the safety and stability of your lamp. When checking what to look for in an arc floor lamp, understanding all components helps you communicate effectively when requesting replacements.
For damaged parts, document the damage with photos before contacting the seller. Most reputable retailers will replace damaged components quickly. Keep all original packaging until you’ve completed assembly and tested the lamp, as you may need it for returns or exchanges.
Maintenance Tips for Long-Lasting Arc Floor Lamps

Proper maintenance extends the life and preserves the appearance of your arc floor lamp. Regular care prevents many common issues before they develop.
For routine cleaning:
– Dust lamp poles and bases weekly with a soft cloth
– Clean metal finishes with appropriate products – avoid abrasive cleaners
– Wipe marble bases with a slightly damp cloth and dry immediately
– Use a feather duster or vacuum with brush attachment for fabric shades
– Clean glass shades with glass cleaner applied to a cloth, not directly to the glass
Black arc floor lamp finishes require special attention to prevent fingerprints and dust from showing. A microfiber cloth works best for these surfaces, and occasional treatment with metal-specific cleaners helps maintain their luster.
Schedule these periodic maintenance checks:
– Monthly: Check all connections for tightness
– Quarterly: Inspect electrical cord for wear or damage
– Biannually: Test switch functionality and check socket condition
– Annually: Tighten all mechanical connections and verify lamp stability
When tightening connections, remember to support the lamp properly to avoid putting stress on other parts. For threaded connections, hand-tightening is usually sufficient – over-tightening with tools can damage threads or components.
Following a comprehensive care guidelines routine not only keeps your lamp looking its best but also ensures it remains safe to use. Pay special attention to electrical components, checking for any signs of wear, heat damage, or loose connections.
Creative Placement Ideas for Your Arc Floor Lamp
Arc floor lamps offer unique versatility in home lighting design. Their distinctive shape allows them to provide overhead illumination without ceiling fixtures, making them perfect for many creative applications.
Consider these placement options:
– Over a reading chair, with the light positioned directly above the seating area
– Beside a sofa, arcing over the center to provide ambient lighting
– Above a dining table as an alternative to a traditional pendant light
– In a corner, spreading light across multiple areas of the room
– Paired with a desk or workspace for adjustable task lighting
The features that affect placement options include arc radius, height adjustability, and base size. Measure your space carefully before determining final placement, ensuring the lamp has enough clearance and won’t create an obstacle in high-traffic areas.
When positioning an arc lamp, consider both functional lighting needs and visual balance within the room. The lamp’s curve can create a dynamic visual element that draws the eye and adds architectural interest to simple spaces. Contemporary arc floor lamp designs particularly excel at creating this visual impact in modern interiors.
For small spaces, consider how the arc lamp’s curve can extend usable space by reaching over furniture rather than requiring floor space beside it. This approach maximizes both lighting function and available room area.

Contemporary Arc Floor Lamp, Large Arc Floor Lamp, Oversized Arched Floor Lamp
$460.63 Select options This product has multiple variants. The options may be chosen on the product page

Adjustable Arc Floor Lamp, Bronze Arc Floor Lamp
Price range: $440.95 through $558.52 Select options This product has multiple variants. The options may be chosen on the product page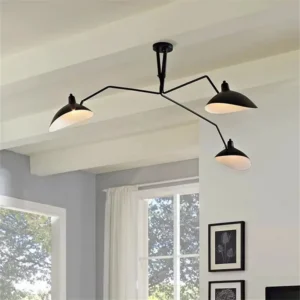 Price range: $174.28 through $658.31 Select options This product has multiple variants. The options may be chosen on the product page
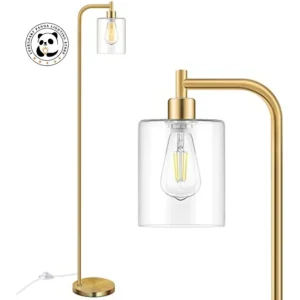
Brass Arc Floor Lamp, Contemporary Arc Floor Lamp, LED Arc Floor Lamp
Price range: $490.72 through $522.04 Select options This product has multiple variants. The options may be chosen on the product page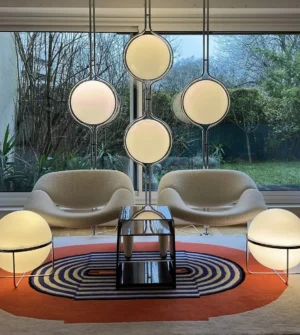

Chrome Arc Floor Lamp, LED Arc Floor Lamp
Price range: $304.95 through $1,210.40 Select options This product has multiple variants. The options may be chosen on the product page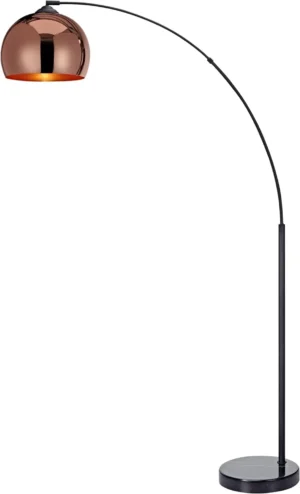

Contemporary Arc Floor Lamp, Large Arc Floor Lamp, Marble Base Arc Floor Lamp
$224.94 Select options This product has multiple variants. The options may be chosen on the product page
Advanced Features: Understanding Adjustable Arc Lamps
Premium arc floor lamps often include adjustment features that enhance their versatility and functionality. Understanding these mechanisms allows you to fully utilize your lamp’s capabilities.
Common adjustment features include:
– Height-adjustable poles using telescoping mechanisms
– Pivoting joints that allow the arc to swing horizontally
– Adjustable angle heads for directing light precisely
– Rotating shades for controlling light direction
– Extendable arms for increasing or decreasing reach
Modern designs with advanced features typically use one of several adjustment mechanisms. Telescoping poles use internal friction locks or collar clamps that must be loosened before adjusting height and tightened securely afterward. Pivoting joints often employ thumb screws or lever locks that allow for position changes when loosened.
When operating adjustment mechanisms:
1. Support the weight of the lamp section being adjusted
2. Loosen the adjustment mechanism just enough to allow movement
3. Move the lamp to the desired position
4. Hold it steady while retightening the mechanism
5. Test stability before releasing
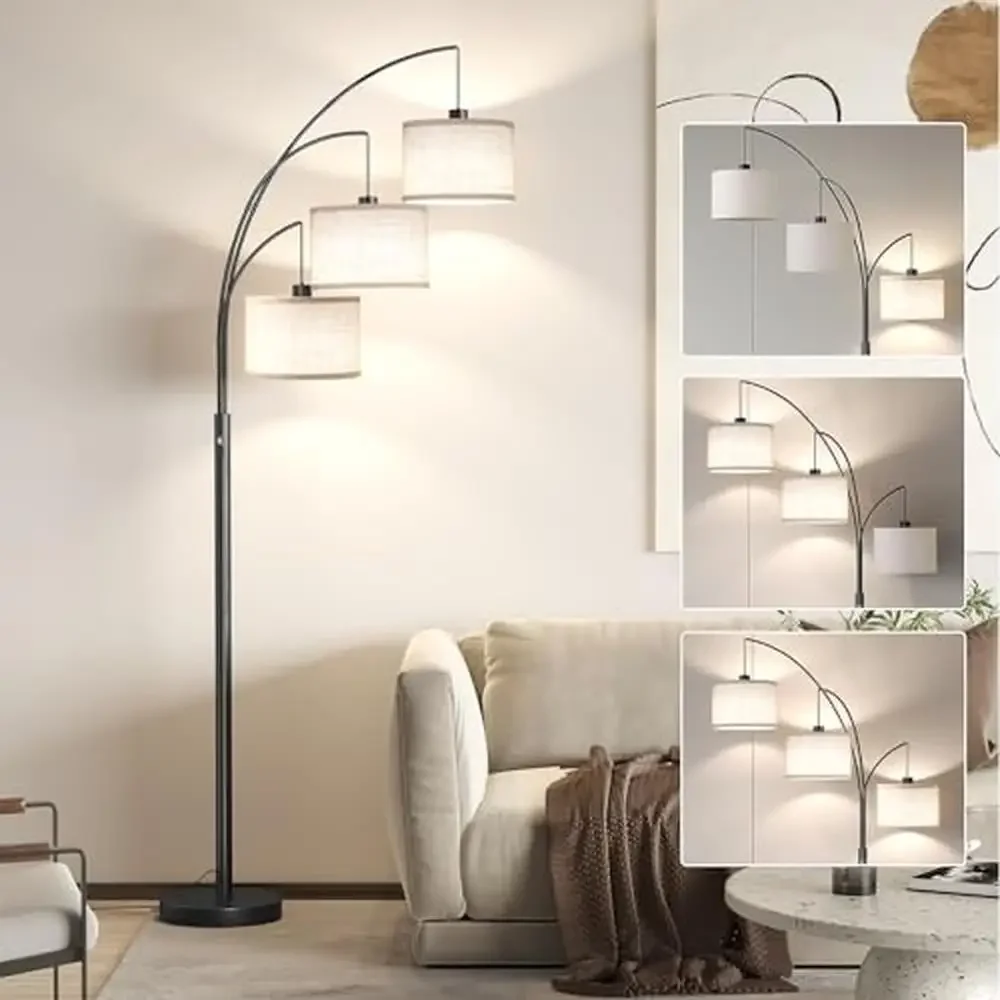
The differences between single and multi-arm arc lamps extend to their adjustment capabilities as well. Multi-light arc floor lamps typically feature independent adjustment for each arm, allowing for customized lighting arrangements. When adjusting these more complex lamps, make changes to one arm at a time while maintaining the lamp’s overall balance.
For safety, never adjust your lamp while it’s plugged in or immediately after use, as the bulb and surrounding parts may be hot. Always support the weight of the lamp head during adjustments to prevent sudden movements that could damage the lamp or cause injury.
With proper understanding of your lamp’s adjustment features, you can transform one lighting fixture into multiple lighting solutions – from focused task lighting to broad ambient illumination – making your arc floor lamp one of the most versatile lighting investments for your home.
Interior Ivy’s collection of arc floor lamps includes models with various adjustment capabilities, allowing you to find the perfect combination of style and functionality for your specific lighting needs.