Understanding the Importance of Proper Tools
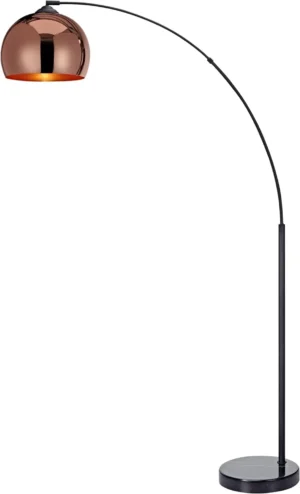
Arc lamps bring elegant illumination to any space with their distinctive curved arm design that extends over furniture. These statement lighting pieces feature adjustable components that allow you to direct light exactly where you need it. Before diving into assembly, understanding what makes choosing the perfect arc floor lamp such an important decision can help you appreciate why proper assembly matters.
Having the right tools on hand makes a significant difference when putting together your new arc lamp. The proper tools not only make assembly faster and more efficient but also prevent damage to delicate lamp components. Many homeowners discover too late that using improper tools can lead to stripped screws, scratched finishes, or misaligned parts.
High-quality arc lamps often represent a significant investment in your home’s aesthetic. With premium models featuring marble bases, wood accents, or brushed metal finishes, using the wrong tool can result in permanent damage to these materials. Industry data suggests that a significant percentage of lamp returns and damage claims stem from assembly issues that could have been prevented with the right tools and techniques.
Basic Tools Every Arc Lamp Assembly Requires
Most arc lamp assemblies require a standard set of household tools that you may already have in your toolkit. Having these basics ready before you begin will streamline the assembly process:
Screwdrivers:
* Phillips head (cross-shaped) screwdriver – typically #2 size for most lamps
* Flathead (slotted) screwdriver – medium size for adjustment screws
* Small precision screwdrivers – for tiny set screws in some premium models
Wrenches and Keys:
* Adjustable wrench – for tightening nuts and bolts
* Hex keys (Allen wrenches) – 4mm, 5mm, and 6mm are commonly needed
* Socket wrench set – for recessed nuts on base components
Pliers:
* Needle-nose pliers – for reaching components in tight spaces
* Standard pliers – for gripping and holding parts during assembly
Measuring Tools:
* Tape measure – to verify correct placement and extension
* Level – to ensure your lamp stands perfectly straight once assembled
Having the correct size tool is often more important than having many different types. Using a Phillips head screwdriver that’s too small or too large can strip screws, making them impossible to tighten properly or remove later. Similarly, using the wrong size hex key can round out the internal surfaces of the bolt heads.
Many adjustable arc floor lamps feature specialized mechanisms that require specific tools for proper assembly and adjustment. Having these ready before you start prevents frustrating pauses mid-assembly.
Specialized Tools for Specific Arc Lamp Models
While basic tools cover most assembly needs, certain premium arc lamp designs require specialized tools for proper assembly. Understanding which lamp features typically need these specialized tools can help you prepare appropriately.
Manufacturers often include specialized tools with their higher-end lamps, recognizing that consumers might not have these on hand. These might include:
- Custom-sized hex wrenches for proprietary hardware
- Specialized tensioning tools for counterbalance mechanisms
- Adjustment keys for unique locking systems
- Small spanners for precision components
If your complete arc floor lamp guide or instruction manual mentions specialized tools but they weren’t included with your purchase, don’t panic. Many specialized tools have common substitutes:
- A pair of thin pliers can often substitute for a specialized spanner
- A carefully sized flathead screwdriver can sometimes work in place of a proprietary adjustment tool
- Needle-nose pliers can be used to tighten small components when proper tools are unavailable
Always check the manufacturer’s instructions first to identify if specialized tools are required for your specific lamp model. This verification step can save significant time and frustration later in the assembly process.
Safety Equipment and Workspace Preparation
Creating a safe, organized workspace is essential for successful arc lamp assembly. Before gathering your tools, prepare your environment:
- Choose a spacious, well-lit area with at least 6 × 6 feet (1.8 × 1.8 meters) of clear floor space
- Lay down a soft blanket or drop cloth to protect both your floor and the lamp components
- Ensure adequate overhead clearance for maneuvering tall lamp pieces
- Position a sturdy table nearby for organizing small components
For personal safety and component protection, consider these items:
- Clean cotton gloves – prevent fingerprints on metal finishes and protect hands from sharp edges
- Eye protection – recommended when working with spring mechanisms or under tension
- Knee pads or a cushion – for comfort during floor-level assembly
- Good lighting – a separate work light helps spot small components

Organization tools make a significant difference in keeping track of small parts:
* Magnetic parts tray – prevents screws from rolling away
* Small bowls or an egg carton – for sorting different types of hardware
* Masking tape and marker – for labeling groups of similar-looking parts
When assembling marble base arc floor lamps, extra caution is necessary as these bases are both heavy and potentially fragile. Prepare a padded surface and consider having a helper available when handling these substantial components.
Pre-Assembly Organization Strategies
Taking time to organize before assembly begins can prevent many common frustrations. Follow these steps for a smooth assembly experience:
Carefully unpack all components – Remove all lamp parts from packaging, being careful not to discard small hardware that might be wrapped separately.
Complete a parts inventory – Cross-reference all components with the parts list in your instruction manual before beginning. This identifies any missing parts before you’re midway through assembly.
Group similar components – Arrange parts in logical groups (base pieces, arm sections, electrical components, shade parts, and hardware).
Organize hardware by size and type – Sort screws, bolts, washers, and nuts into separate containers. A muffin tin or egg carton works perfectly for this purpose.
Read instructions completely – Review the entire complete guide to assembling arc floor lamps before picking up your first tool. Mark key steps with sticky notes if necessary.
Arrange tools in order of use – Based on the instructions, place tools in the sequence you’ll need them to avoid searching for the right tool mid-assembly.
Prepare a clean surface for the lampshade – Delicate fabric or paper shades should be kept separate until final assembly to prevent damage.
This organization process typically takes just 10-15 minutes but can save hours of frustration during assembly. Having all components verified, sorted, and readily accessible creates a smoother workflow and reduces the likelihood of mistakes.
Tools You Likely Won’t Need (Common Misconceptions)
Many people overprepare for arc lamp assembly by gathering tools that aren’t actually necessary. Understanding what you don’t need can simplify your preparation:
Power tools – Electric drills and impact drivers are rarely needed and can actually damage lamp components due to their torque. Most arc lamps are designed for hand tool assembly only.
Electrical tools – Wire strippers, voltage testers, and electrical tape typically aren’t necessary as consumer arc lamps come pre-wired with polarized plugs ready to use.
Heavy construction tools – Hammers, saws, and pry bars have no place in standard lamp assembly and will likely cause damage if used.
Advanced measuring tools – While a basic level is helpful, laser levels and other precision measuring devices are unnecessary for typical home assembly.
Modern arc floor lamp designs are engineered for straightforward assembly using basic tools. The connections are typically mechanical rather than electrical, using threaded connections and simple locking mechanisms rather than complex wiring or construction techniques.
Understanding that arc lamp assembly is primarily a matter of connecting pre-made components rather than building something from scratch helps set appropriate expectations about the tools required.
Tool-Specific Assembly Techniques for Arc Lamps
Knowing how to use your tools effectively can make the difference between a wobbly lamp and a sturdy statement piece. Here are techniques specific to arc lamp assembly:
Screwdriver Techniques:
1. Use the correct size and type to prevent stripping screws
2. Apply steady, direct pressure while turning to maintain contact
3. For recessed screws, use a magnetic screwdriver to prevent dropping screws inside lamp components
Wrench and Pliers Usage:
1. Wrap metal components in a thin cloth before gripping with pliers to prevent marring finishes
2. Use adjustable wrenches at right angles to avoid knuckle injuries if the wrench slips
3. Tighten connections in stages, alternating between components for even pressure
Hex Key/Allen Wrench Techniques:
1. Insert the long end into the screw for better leverage
2. Turn with steady pressure rather than forcing
3. Ensure the key is fully seated before applying pressure to avoid stripping

Measuring and Leveling:
1. Check level at multiple points during assembly, not just at the end
2. Measure arc height both at the apex and where light falls to ensure proper positioning
3. Verify measurements before final tightening of adjustable components
These avoiding damage when assembling floor lamps techniques are particularly important for tension-based arc lamps that rely on properly balanced components. Many premium designs feature counterweight systems that require even tension during assembly to function correctly.
For multi-piece arc arms, support each section as you connect it to prevent stress on the joints until all fasteners are in place and partially tightened. Only then should you proceed with final tightening in a sequential pattern.
Troubleshooting Common Tool-Related Assembly Issues
Even with the right tools and careful preparation, you might encounter challenges during assembly. Here are solutions to common issues:
Q: Screws won’t tighten properly – they keep spinning but don’t secure.
A: This usually indicates cross-threading or a stripped screw hole. Try backing the screw out completely and reinserting at a slight angle while turning counterclockwise until you feel a small “click” as threads align, then tighten normally.
Q: Components don’t align correctly when assembled.
A: Loosen all connecting screws in the misaligned section, reposition components correctly, then tighten screws gradually in an alternating pattern rather than one screw completely before moving to the next.
Q: The lamp wobbles despite all connections being tight.
A: Check the floor surface first. If that’s level, slightly loosen base components, adjust until level, then retighten. For large arc floor lamps, ensure the counterweight is properly installed as its position is critical to stability.
Q: Metal components seem to be binding or sticking during assembly.
A: Never force parts together. Apply a tiny amount of candle wax or dry soap to threads or connection points to help components slide together smoothly without damaging finishes.
Q: Parts seem to be missing from the package.
A: Before contacting the manufacturer, check all packaging thoroughly including inside cardboard sleeves and under flaps. Small components are sometimes taped to larger pieces or contained in unmarked internal packages.
If troubleshooting doesn’t resolve the issue, consult your manual for manufacturer support contact information. Most reputable lamp companies offer excellent customer service for assembly difficulties.
Contemporary Arc Floor Lamp, Large Arc Floor Lamp, Oversized Arched Floor Lamp
$460.63 Select options This product has multiple variants. The options may be chosen on the product pageAdjustable Arc Floor Lamp, Bronze Arc Floor Lamp
Price range: $440.95 through $558.52 Select options This product has multiple variants. The options may be chosen on the product pageContemporary Arc Floor Lamp, Large Arc Floor Lamp, Marble Base Arc Floor Lamp
$224.94 Select options This product has multiple variants. The options may be chosen on the product pageMid-Century Arc Floor Lamp, Wood Arc Floor Lamp
$230.86 Select options This product has multiple variants. The options may be chosen on the product pageVintage Arc Floor Lamp, Wood Arc Floor Lamp
Price range: $603.87 through $1,346.09 Select options This product has multiple variants. The options may be chosen on the product page- $1,003.85 Select options This product has multiple variants. The options may be chosen on the product page
Are Professional Tools Required for Arc Lamp Assembly?
Most consumers wonder if they need to invest in professional-grade tools for successful arc lamp assembly. The good news is that most arc lamps from Interior Ivy and other quality manufacturers can be assembled with basic household tools of reasonable quality.
Professional-grade tools may offer advantages in certain situations:
* When assembling multiple lamps (like outfitting an entire office or living space)
* For lamps with very small or precision hardware
* If you plan to adjust or disassemble your lamp frequently
The primary benefit of professional tools is their precision engineering and comfort during use. A professional-grade hex key set, for example, may have more comfortable handles and more precise sizing that reduces the risk of stripping screws.
For most home users assembling a single lamp, mid-range household tools are entirely sufficient. If you’re choosing between buying specialty tools or selecting a different lamp style, knowing what to look for in an arc floor lamp can help you make the right decision for your needs and tool inventory.
Can You Assemble an Arc Lamp Without the Manufacturer’s Instructions?
While not recommended, assembling an arc lamp without the original instructions is possible if you understand basic lamp construction principles. Most arc lamps follow a similar assembly sequence:
- Assemble the base components and ensure stability
- Connect the vertical support to the base
- Attach the arched arm components in sequence
- Install any counterweight mechanisms
- Connect the shade or light fixture
- Install any bulbs and test functionality
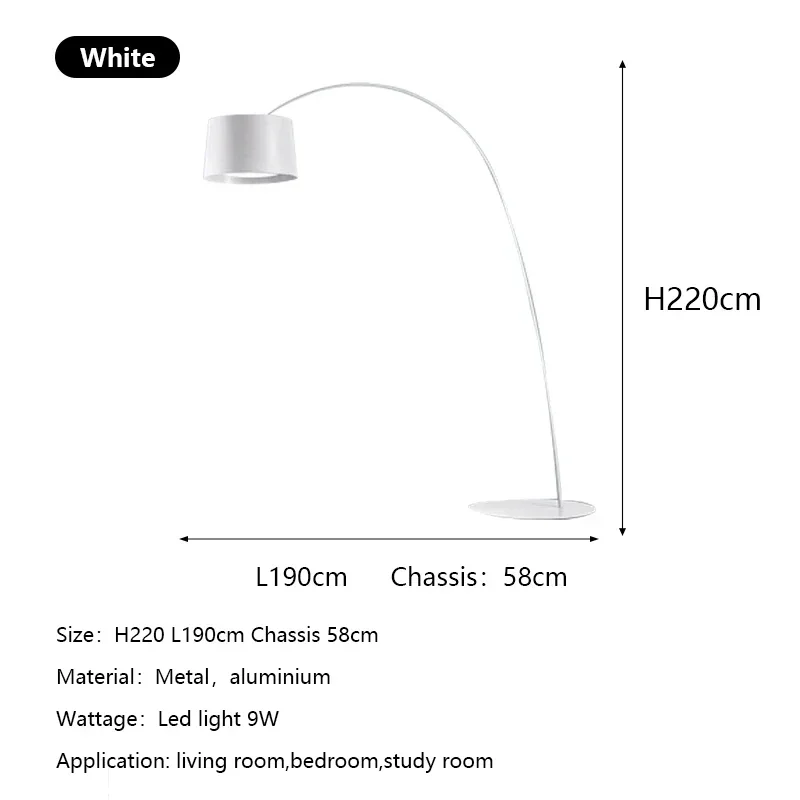
If you’ve purchased a wood arc floor lamp or other specialized design without instructions, check the manufacturer’s website for downloadable manuals or contact customer service. Many companies maintain digital copies of assembly instructions that can be emailed upon request.
As a last resort, search online for assembly videos of similar lamp models, as the general construction principles are often comparable across brands with similar designs.
Final Assembly Tips and Best Practices
After completing the main assembly, these final steps ensure your arc lamp functions perfectly:
Perform final adjustments gradually – Make small adjustments to tension and position rather than dramatic changes all at once.
Test stability before final placement – Gently push the lamp in different directions to ensure it returns to position and doesn’t tip over.
Follow the correct tightening sequence – Generally tighten from the ground up, ensuring base stability before securing arm components.
Clean as you finish – Use a soft microfiber cloth to remove fingerprints and tool marks from metal surfaces.
Properly dispose of packaging but save small parts – Keep extra screws, washers, and any included tools with the instruction manual for future adjustments.
Test all adjustment mechanisms – Ensure that any height adjusters, swivel joints, or dimmer switches function smoothly before considering assembly complete.
For those who value simplicity, exploring easy to assemble arc floor lamps might be worth considering for future purchases. These models are specifically designed with fewer parts and more intuitive assembly processes.
Taking care during the final stages of assembly pays dividends in both the appearance and longevity of your arc lamp. A properly assembled lamp not only looks better but will also maintain its stability and functionality for years to come, making the time invested in proper assembly techniques well worth the effort.

