
Introduction to Arc Lamp Assembly
Arc floor lamps have become a striking centerpiece in modern interior design, combining elegant aesthetics with functional lighting. These distinctive lamps, characterized by their curved arm extending from a weighted base, create a dramatic architectural element while providing overhead illumination without ceiling fixtures. Proper assembly is crucial not only for the lamp’s visual appeal but also for ensuring safety, stability, and optimal functionality throughout its lifespan.
In this comprehensive guide, you’ll learn everything needed to successfully assemble your arc lamp, from preparation and basic steps to design-specific techniques and troubleshooting. We’ve gathered insights from interior design experts and customer experiences to create foolproof instructions that will make your assembly process smooth and rewarding.
What you’ll discover in this guide:
– Essential safety precautions before beginning assembly
– Complete pre-assembly preparation checklist
– Step-by-step assembly instructions applicable to most designs
– Specific techniques for various arc lamp styles
– Troubleshooting common assembly challenges
– Tips for ensuring stability and longevity
Before diving into assembly, it helps to understand the different arc floor lamp styles available and their features. If you’re working with a contemporary design, our collection of modern arc floor lamps showcases designs you may be assembling.
Essential Safety Precautions Before Assembly
Taking proper safety measures before and during arc lamp assembly ensures not only your well-being but also protects your new lighting fixture from damage. A methodical approach to safety creates the foundation for successful assembly.
Electrical Safety:
– Always work in a completely unplugged state
– Keep all components away from water and moisture
– Inspect all wires for damage before assembly
– Never modify electrical components not designed for adjustment
– Have a clear understanding of which components contain electrical elements
Physical Safety:
– Use appropriate lifting techniques when handling heavy marble base arc floor lamps
– Wear gloves when handling metal parts with potentially sharp edges
– Keep small parts away from children and pets
– Work on a clean, stable surface with adequate space
– Never force components together if they don’t fit easily
Set up your workspace away from high-traffic areas where the partially assembled lamp could be bumped or knocked over. Keep the manufacturer’s instructions nearby as a reference alongside this guide, as specific models may have unique requirements not covered in general instructions. The complete arc floor lamp guide provides additional context about features you’ll be working with.
Complete Pre-Assembly Checklist
Before beginning the actual assembly process, proper preparation will save time and prevent frustration. This checklist ensures you have everything needed and are ready to proceed efficiently.
Parts Inventory:
– Weighted base (marble, metal, or composite material)
– Main pole sections (typically 2-3 pieces)
– Arched arm component
– Lampshade or light fixture head
– Hardware package (screws, washers, nuts)
– Wire connectors and electrical components
– Dimmer switch or standard switch (model dependent)
– Light bulb (may or may not be included)
Tools Required:
– Phillips and flathead screwdrivers
– Adjustable wrench
– Allen wrench/hex key (often included)
– Pliers (needle-nose preferred)
– Soft cloth or gloves for handling finished surfaces
– Level for ensuring proper alignment
– Scissors for packaging removal
Workspace Preparation:
– Clear a flat, clean area at least twice the size of the fully assembled lamp
– Lay down a blanket or soft material to prevent scratches
– Arrange good lighting to see small components clearly
– Sort and group similar parts together
– Keep the parts in their packaging until needed to avoid loss
– Have the instruction manual and this guide easily accessible
Understanding the purpose and look of each component helps tremendously during assembly. Our guide on what to look for in an arc floor lamp can help you identify the critical components and their functions.
Step-by-Step Arc Lamp Assembly Process
Follow these sequential steps to assemble your arc lamp. While specific models may have slight variations, these core steps apply to most popular designs.
1. Securing the Base
Begin with the heaviest component—the base. If it comes in multiple pieces, assemble these first according to manufacturer instructions. Place it on a flat surface where you intend to position the lamp. For bases with protective padding, ensure these are properly attached to prevent floor damage.
2. Connecting Pole Sections and Threading Wires
Start with the lowest pole section that attaches to the base. Secure it firmly, ensuring it stands perfectly vertical. Before connecting additional pole sections, thread the electrical cord through the hollow center. Continue adding and tightening each section, making sure the wire remains unkinked and moves freely through the assembled pole.
3. Attaching the Arc Arm
Connect the curved arc component to the top of the vertical pole. This connection often includes a pivoting mechanism or joint that allows for height and angle adjustments. Secure all fasteners but avoid over-tightening, which could strip threads or damage finish. The arc should feel secure but still adjustable if the design permits.
4. Wiring and Socket Connection
Once the structural elements are connected, focus on the electrical components. Connect wire ends according to the color-coding (typically matching black to black, white to white, and green or bare copper to ground). Secure connections with wire nuts, wrapping electrical tape around them for additional security if needed.
5. Installing Lampshade and Diffuser
Attach the lampshade bracket to the end of the arc arm. Depending on the design, this may involve a harp assembly, threaded socket, or specialized mounting hardware. Position any diffusers or glass components as directed. Ensure the shade sits level and is securely attached.
6. Inserting the Light Bulb
Install the recommended bulb type and wattage as specified by the manufacturer. Never exceed the maximum recommended wattage. For lamps with multiple bulbs, repeat this process for each socket.
7. Final Adjustments and Placement
With the lamp fully assembled, make final adjustments to the arc position, shade orientation, and overall balance. Position the lamp in its intended location, ensuring the cord reaches an outlet without creating a tripping hazard.
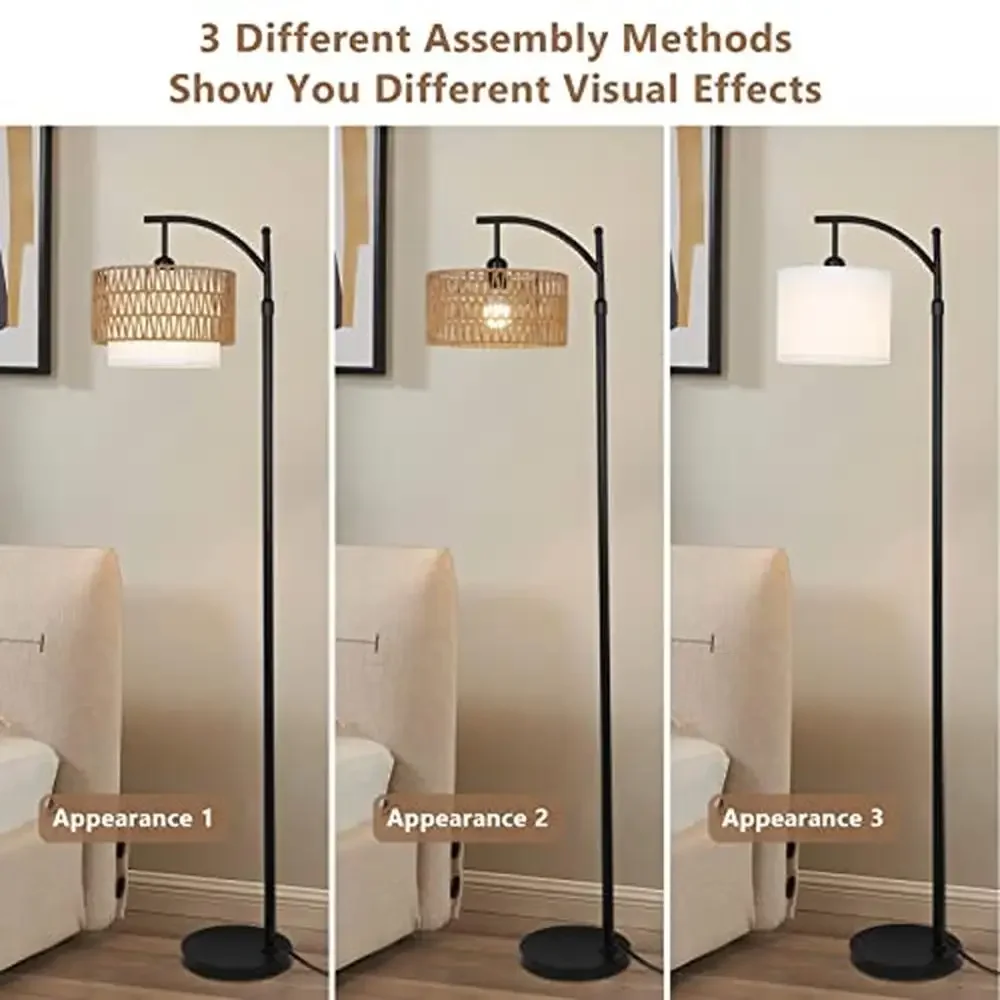
For lamps with special features, such as adjustable arc floor lamps, pay particular attention to the mechanisms that control height and angle. These often require additional steps for proper calibration.
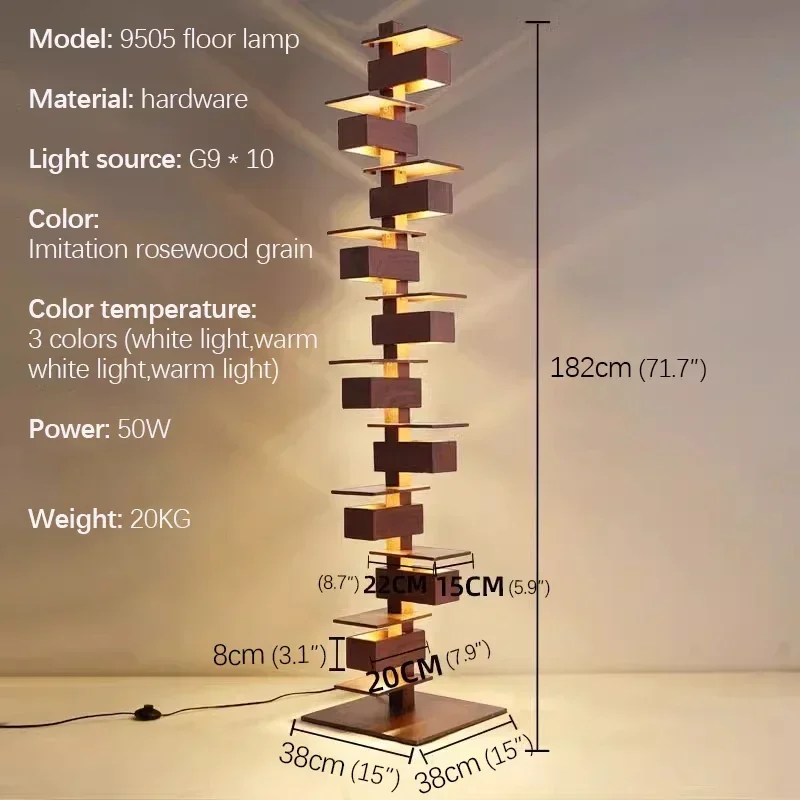
Assembly Techniques for Different Arc Lamp Styles
Different arc lamp designs present unique assembly challenges and requirements. Tailor your approach based on the specific style of your lamp.
Single-Arm vs. Multi-Arm Designs:
Single-arm lamps generally follow the basic assembly process outlined above. However, multi-light arc floor lamps require special attention to balance distribution. When assembling these more complex designs:
– Install all arms before any lampshades to assess balance
– Work symmetrically, tightening connections on opposing arms in alternation
– Test stability frequently during assembly
– Ensure weight is evenly distributed across all arms
The choice between single and multi-arm arc lamps affects not only the assembly process but also the final lighting effect in your space.
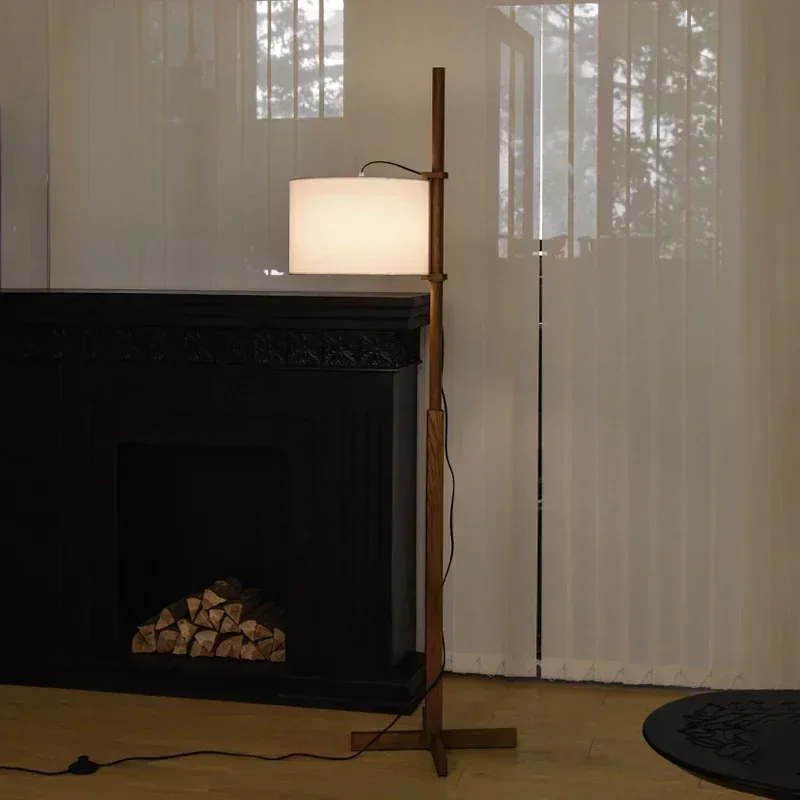
Material-Specific Techniques:
– Marble Bases: Use extreme caution when handling; never lift by the attached pole. Consider having an assistant help position the base. Use felt pads underneath to prevent floor scratching.
– Wood Components: Avoid overtightening hardware into wooden parts, which can split the material. Use hand tools rather than power tools for final tightening.
– Glass Elements: Install any glass components last to minimize breakage risk. Wear gloves to avoid fingerprints and handle edges with care.
– Metal Finishes: Use the provided soft cloth when handling visible metal components to prevent fingerprints and smudges on decorative finishes.
Weight Distribution Considerations:
– Heavier bases require more careful alignment of the vertical pole to ensure stability
– Cantilever designs with extended arcs may need counterweight adjustments
– Floor surface affects stability—carpets may require additional base support
Wiring and Electrical Components Assembly Guide
Proper electrical assembly ensures your lamp functions safely and reliably. Follow these steps carefully, as electrical components require precision and attention to detail.
1. Identify All Electrical Components
Before beginning, identify the power cord, socket assembly, switch mechanism, and any included dimmer components. Check that insulation is intact on all wiring.
2. Thread Wiring Through Lamp Structure
As you assemble the pole sections, feed the wiring through carefully. Avoid forcing or yanking the wire, which can damage connections or insulation. Leave some slack at connection points.
3. Connect Wire Ends
Connect wires according to standard color coding:
– Black or red (hot) wires connect to brass-colored terminals
– White (neutral) wires connect to silver-colored terminals
– Green or bare copper (ground) wires connect to green terminals or grounding screws
4. Secure Wire Connections
Use the provided wire nuts to secure connected wire ends. Twist clockwise until tight, then wrap with electrical tape if extra security is needed.
5. Install Dimmer Switch (If Applicable)
For dimmable arc floor lamps, follow the specific instructions for installing the dimmer mechanism. This typically involves connecting the dimmer switch inline with the power cord.
SAFETY BOX:
Never attempt electrical connections with the lamp plugged in. If you notice any damaged wires, missing components, or are uncertain about any step, consult with a qualified electrician. Never bypass safety features or modify electrical components not designed to be altered.
Troubleshooting Common Arc Lamp Assembly Problems
Even with careful assembly, you might encounter some common issues. Here are solutions to the most frequently reported problems:
Stability Issues and Wobbling:
– Problem: Lamp feels unsteady or wobbles when touched
– Solution: Check that all connections are fully tightened, especially at the base. Ensure the floor surface is level. For persistent wobbling, consider adding weight to the base or repositioning for better balance.
Wire Connection Problems:
– Problem: Lamp doesn’t light up when switched on
– Solution: Unplug and check all wire connections. Ensure wire nuts are securely fastened and no loose wires are exposed. Verify the bulb is functional and properly installed.
Lampshade Alignment Difficulties:
– Problem: Shade sits crooked or won’t stay in position
– Solution: Check that the harp or shade mounting bracket is properly attached. Adjust any thumb screws or fasteners that secure the shade. Ensure the shade isn’t warped or damaged.
Uneven Arc Positioning:
– Problem: Arc doesn’t extend properly or stays at an awkward angle
– Solution: Loosen adjustment points along the arc, realign to desired position, and retighten. Check for any packaging materials that might still be attached and restricting movement.
Switch or Dimmer Functionality Issues:
– Problem: Switch doesn’t operate smoothly or dimmer has limited range
– Solution: Check for any transit locks or protective elements that need removal. Ensure the switch mechanism is fully assembled and properly connected to wiring.
Many concerns about arc floor lamp stability can be addressed during proper assembly. For persistent wobbling, our guide on weighted bases for arc lamps offers additional solutions.
Balancing and Stabilizing Your Arc Lamp
The distinctive arched design of these lamps requires special attention to balance and stability for both safety and optimal function.
Arc lamps distribute weight differently than traditional floor lamps, with the light source extending away from the vertical support. This creates a natural leverage effect that must be counterbalanced by a properly weighted base. Ensure your lamp sits on a completely level surface, as even slight inclines can amplify stability issues.
For optimal stability:
– Position the heaviest part of the base toward the direction of the arc
– Adjust the arc to remain within the “footprint” of the base when possible
– Consider the surface beneath—plush carpets may allow more movement than hard floors
– Keep the lamp away from high-traffic areas or doorways where it might be bumped
TIP: For wood arc floor lamps or other lighter designs, you can place furniture strategically around the base to provide additional stability and protection from accidental bumps.
If your lamp feels unstable despite proper assembly, don’t hesitate to add weight to the base. This can be done discreetly using adhesive weights or by placing a heavy decorative object on the base if the design allows.
Post-Assembly Adjustments and Checks
Once your lamp is fully assembled, perform these final checks before regular use to ensure everything is functioning properly.
Final Safety Checklist:
– All connections are tight and secure
– No exposed wires are visible
– Base sits flat without rocking
– Arc is properly balanced and secured
– Lampshade is correctly attached and level
– Switch operates smoothly
– No packaging materials remain attached
Functional Tests:
– Turn the lamp on and off several times to ensure reliable operation
– If dimmable, test the full range of the dimmer
– Check that adjustable components move as expected
– Ensure the light direction can be adjusted as needed
Fine-Tuning Adjustments:
– Position the shade for optimal light distribution
– Adjust the arc height and angle for desired illumination area
– Align any decorative elements for best appearance
– Find the perfect arc floor lamp height for your specific furniture arrangement

After initial use, recheck all connections as the lamp settles. Some minor tightening may be needed after a few days of use, particularly for adjustable components.

Contemporary Arc Floor Lamp, Large Arc Floor Lamp, Oversized Arched Floor Lamp
$460.63 Select options This product has multiple variants. The options may be chosen on the product page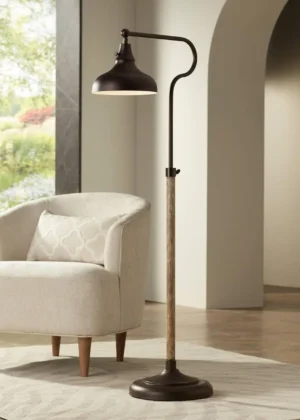

Adjustable Arc Floor Lamp, Bronze Arc Floor Lamp
Price range: $440.95 through $558.52 Select options This product has multiple variants. The options may be chosen on the product page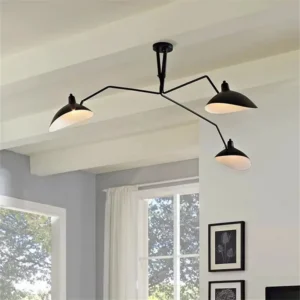 Price range: $174.28 through $658.31 Select options This product has multiple variants. The options may be chosen on the product page
Brass Arc Floor Lamp, Contemporary Arc Floor Lamp, LED Arc Floor Lamp
Price range: $490.72 through $522.04 Select options This product has multiple variants. The options may be chosen on the product page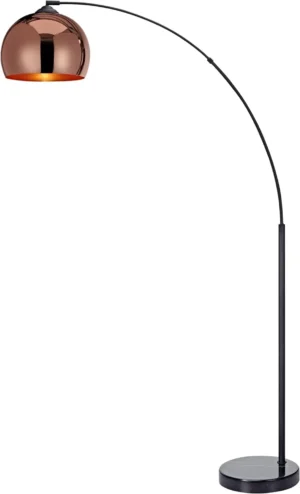

Contemporary Arc Floor Lamp, Large Arc Floor Lamp, Marble Base Arc Floor Lamp
$224.94 Select options This product has multiple variants. The options may be chosen on the product page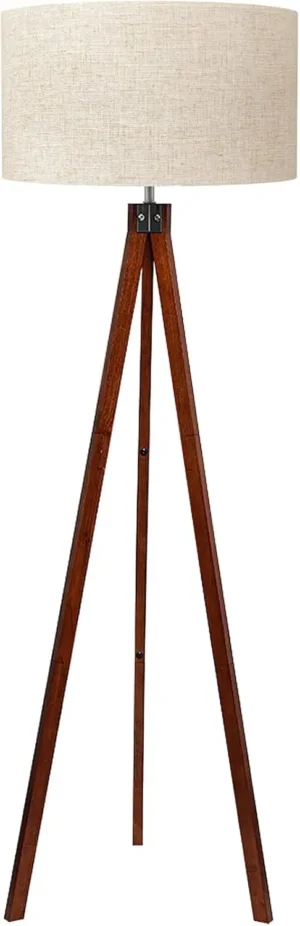

Mid-Century Arc Floor Lamp, Wood Arc Floor Lamp
$230.86 Select options This product has multiple variants. The options may be chosen on the product page
Arc Lamp Maintenance After Assembly
Proper maintenance extends the lifespan of your arc lamp and preserves both functionality and appearance. Regular care prevents many common issues that develop over time.
Establish a simple maintenance routine that includes:
– Dusting the entire lamp weekly with a soft microfiber cloth
– Checking and tightening any loose connections monthly
– Inspecting the electrical cord for wear quarterly
– Cleaning the lampshade according to material recommendations
– Testing the stability of the base and adjustments seasonally
For specific materials, follow these care guidelines:
| Material | Cleaning Method | Special Considerations |
|---|---|---|
| Marble | Damp cloth with mild soap, dry immediately | Avoid acidic cleaners, seal annually |
| Metal | Microfiber cloth, metal polish for stubborn spots | Use appropriate polish for specific finish (brass, chrome, etc.) |
| Wood | Dry dusting, occasional wood cleaner | Keep away from direct sunlight to prevent fading |
| Glass | Glass cleaner on cloth (not sprayed directly) | Clean when lamp is off and cool |
| Fabric Shades | Vacuum with upholstery attachment | Spot clean only, avoid saturation |
When replacing bulbs, always unplug the lamp first and allow it to cool completely. Handle the new bulb with a cloth to prevent oils from your fingers transferring to the glass, which can cause premature bulb failure.
Is Professional Assembly Worth It?
While most arc lamps can be successfully assembled by the average homeowner, certain situations might warrant professional assembly assistance.
DIY assembly is appropriate when:
– You have basic tools and mechanical aptitude
– The lamp has straightforward design with clear instructions
– You have adequate space to work
– The lamp has standard components and connections
Professional assembly might be worth considering when:
– The lamp features complex electrical components or custom wiring
– The design includes exceptionally heavy or delicate materials
– You lack confidence in handling electrical connections
– Time constraints make DIY assembly impractical
Professional assembly typically costs between $50-$150 depending on complexity and location, which may be worthwhile for high-end lamps or those with multiple lighting elements. When exploring our top arc lamp features buying guide, consider assembly complexity as one factor in your purchase decision.
How Do Arc Lamp Designs Affect Assembly Difficulty?
The design of your arc lamp significantly impacts the assembly process. Understanding these differences helps set realistic expectations for the time and effort required.
Simpler designs like traditional single-arm arcs with solid-pole construction typically require 30-45 minutes for assembly. These feature straightforward connections and minimal electrical complexity, making them ideal for first-time assemblers.
More complex designs include:
– Multi-arm models with separate wiring for each light
– Lamps with integrated dimming systems or smart features
– Designs with highly adjustable components
– Models with counterweight systems for extended arcs
The most challenging designs often combine premium materials with advanced functionality. For example, a marble-based lamp with multiple adjustable arms and integrated LED technology requires careful handling of both heavy components and sensitive electronics.
When browsing best arc lamps for living rooms, consider not just the appearance but also the assembly process that each design will require. Interior Ivy carefully selects lamps that balance innovative design with practical assembly considerations.