
Introduction to Arc Floor Lamp Assembly
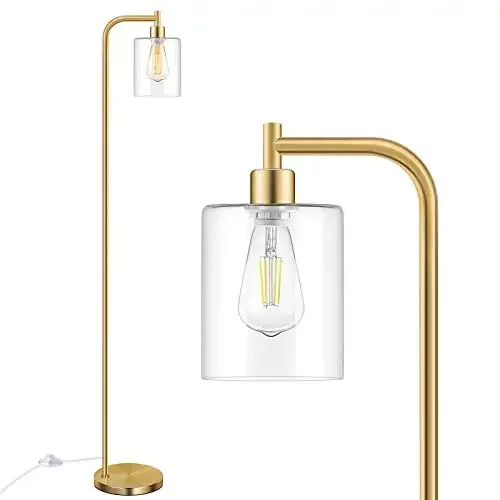
Arc floor lamps have become a staple in modern interior design, combining elegant aesthetics with practical lighting solutions. These distinctive fixtures feature a weighted base, vertical pole, gracefully curved arm, and stylish shade that extends over your furniture—creating both a functional light source and an eye-catching design element.
Whether you’ve purchased a minimalist design with clean lines or a more elaborate model with multiple lights, the assembly process follows similar fundamental steps. Most arc floor lamps can be assembled in approximately 20-30 minutes with moderate effort, though specific models may vary slightly in their construction.
This comprehensive guide will walk you through the entire assembly process, ensuring your new statement piece is set up correctly and safely. Before diving into any assembly project, it’s helpful to familiarize yourself with:
- The basic components of your lamp
- Required tools and hardware
- Assembly sequence and techniques
- Safety considerations
Taking time to properly assemble your arc floor lamp ensures both its visual appeal and structural integrity, allowing you to enjoy its beauty for years to come. For those still exploring options, choosing the perfect arc floor lamp involves considering factors beyond just assembly ease.
Essential Safety Precautions Before Assembly
Before unpacking your new arc floor lamp, take a moment to review these important safety guidelines that will protect both you and your new lighting fixture during assembly:
- Read through this entire guide before beginning assembly to understand the complete process
- Work in a well-lit area away from children and pets to avoid accidents
- Ensure all electrical connections remain unplugged until assembly is completely finished
- Handle the weighted base with proper lifting technique (using your legs, not your back) as these bases can be surprisingly heavy
- Pay careful attention to manufacturer specifications, particularly regarding maximum bulb wattage (typically 40-60 watts for most arc lamps)
- Wear appropriate protective gear if your assembly involves tools
- Never force components together if they don’t fit easily
- Keep all packaging materials until assembly is complete in case you need to return the lamp
Taking these precautions seriously will help prevent damage to your new lamp and ensure your safety during the assembly process. Having the right essential tools for arc lamp assembly ready before you begin will make the entire process smoother and more efficient.
What You’ll Need: Tools and Materials Checklist
Before starting assembly, gather these items to ensure a smooth process:
Common Tools:
– Phillips screwdriver (medium size)
– Allen wrench (often included with the lamp)
– Adjustable wrench for tightening connections
– Soft cloth or blanket to protect lamp components
Included with Your Lamp:
– All lamp components (base, pole sections, arc arm, shade)
– Hardware package (screws, nuts, bolts, washers)
– Manufacturer’s instruction manual
Additional Helpful Items:
– Helper for managing larger components
– Good lighting to see connections clearly
– Clear workspace (approximately 6 x 6 feet)
– Container to organize small hardware pieces
Having everything prepared before you begin will make the assembly process much more efficient. For lamps with special features, adjustable arc floor lamps may require additional attention to mechanical components that control height or angle adjustments.
Unboxing and Component Inspection
Proper unboxing is the first critical step in successful arc lamp assembly:
- Clear a large, flat surface before opening packaging
- Carefully remove the lamp components, watching for small hardware that might be taped to larger pieces
- Place all parts on a soft surface to prevent scratches
- Organize components by type and assembly sequence
- Check for any protective plastic or foam that needs removal
Take inventory of these typical arc floor lamp components:
– Weighted base (often the heaviest piece)
– Vertical pole section(s) (may be single or multiple pieces)
– Arc arm that creates the characteristic curved shape
– Lampshade or light fixture head
– Hardware package containing screws, nuts, washers, and connectors
If you discover any damaged or missing parts, document them with clear photos before proceeding. Contact the retailer immediately rather than attempting to work with defective parts. Keep all packaging materials until you’ve confirmed that assembly is complete and successful.
For more complex fixtures, 3-light arc floor lamps require special attention during the unboxing phase to keep track of multiple shade components and additional hardware.
Step 1: Assembling the Base and Support Pole
The foundation of your arc lamp begins with properly connecting the base and support pole:
- Place the weighted base on a flat surface with the mounting hardware facing up
- Locate the main support pole and identify the end that connects to the base
- Align the threaded hole in the base with the corresponding bolt or threaded section of the pole
- Insert the connection hardware (typically a large bolt or threaded rod)
- Hand-tighten the connection initially to ensure proper alignment
- Use your Allen wrench or screwdriver to fully secure the connection, but avoid overtightening which can strip threads
- Test the stability by gently trying to wobble the pole – there should be no movement at the connection point
For heavier bases weighing 15-25 pounds, ensure the connection is particularly secure as this joint bears significant stress when the lamp is fully assembled.
If you encounter resistance during assembly, don’t force components together. Instead, check for alignment issues or debris in the threads. A properly assembled base-to-pole connection should feel solid with no wiggling or movement.
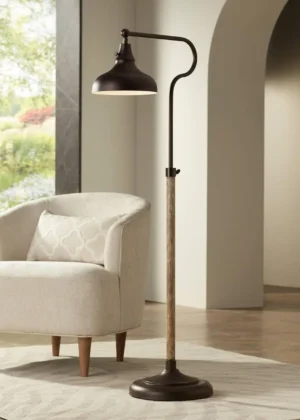
The distinct weight and stability of marble base arc floor lamps provide exceptional stability but require special care during this step to avoid damaging the natural stone material.
Step 2: Connecting Multiple Pole Sections (If Applicable)
Many arc floor lamps feature multiple pole sections that must be connected before attaching the arc arm:
- Identify if your lamp includes multiple pole sections (check the instruction manual for confirmation)
- Locate any wiring that needs to run through the poles and ensure it’s positioned correctly
- Align the sections carefully, noting any specific orientation requirements
- For threaded connections: twist sections together until tight, being careful not to damage any internal wiring
- For push-fit connections: align and firmly push together until secure
- For locking mechanisms: align, connect, and engage the locking feature (often requiring a quarter turn or locking lever)
- After connecting each section, gently test the connection before proceeding
When fully assembled, standard arc lamp poles typically reach 5-7 feet in height. Be particularly careful when handling long pole sections to avoid damage to your surroundings.
Take care when managing electrical cords running through the poles—avoid pinching or twisting wires during assembly. If you encounter significant resistance when connecting sections, stop and check for obstructions or misalignment rather than forcing components together.
For those seeking simpler options, easy-assemble arc floor lamps feature streamlined designs with fewer connection points and intuitive assembly mechanisms.
Step 3: Attaching the Arc Arm to the Main Pole
The distinctive curved arm is what gives an arc lamp its character and requires careful attachment:
- Identify the connection mechanism between the main pole and arc arm (typically a metal joint with screws or a locking system)
- If the lamp has internal wiring, ensure it’s properly threaded through both the pole and arc arm before securing connections
- Position the arc arm at the correct angle according to the instruction manual
- Secure the connection using the provided hardware—this often involves tightening screws on opposite sides of a joint
- Tighten connections enough to prevent wobbling while still allowing any intentional adjustability
- Test the stability by gently pressing downward on the extended end of the arc
- Verify that any adjustment mechanisms work properly (if your model features adjustable height or angle)
Most arc arms extend 24-48 inches from the center pole, creating a significant leverage effect. This makes a secure connection essential for safety and stability.
Watch for these signs of a proper connection:
– No visible gaps between connected parts
– Even tension on all fastening points
– Smooth operation of any adjustment mechanisms
– No excessive movement or wobbling when gently tested
For comprehensive information on selecting and setting up the perfect lighting piece, our perfect arc floor lamp guide provides additional insights beyond assembly.
Step 4: Installing the Lamp Head and Shade
With the main structure assembled, now it’s time to install the lamp head and shade:
Identify your lamp head type and attachment method:
– Socket with harp and finial
– Direct threaded socket
– Clamp-style attachmentFor harp systems:
– Attach the harp to the socket
– Place the shade on top of the harp
– Secure with the finial (decorative top piece)For threaded sockets:
– Remove any socket ring if present
– Place shade directly on socket
– Secure with socket ringFor clamp systems:
– Loosen the clamp mechanism
– Position shade correctly
– Tighten clamp to secureAfter attaching the shade, test the balance of your lamp—the counterweight in the base should offset the extended arm and shade
- Make any necessary adjustments to ensure the shade sits level and straight
When handling shades, be particularly gentle with fabric or glass components that can be easily damaged. Allow appropriate clearance around the shade for heat dissipation, especially with higher wattage bulbs.
For specialized lighting needs, LED arc floor lamps often feature integrated light sources with unique shade attachment systems that require specific installation steps.
Step 5: Electrical Connections and Bulb Installation
Proper electrical setup ensures your lamp functions safely and effectively:
- Carefully manage any exposed wiring, ensuring it runs neatly through the lamp’s structure without pinching or stretching
- Identify the socket type in your lamp head (common types include E26/E27 medium base or candelabra)
Select an appropriate bulb based on:
– Maximum wattage specified by the manufacturer (typically 40-60 watts)
– Socket type compatibility
– Desired brightness and color temperature
– Energy efficiency preferences (LED bulbs use significantly less energy)Install the bulb by gently screwing it into the socket—never force or overtighten
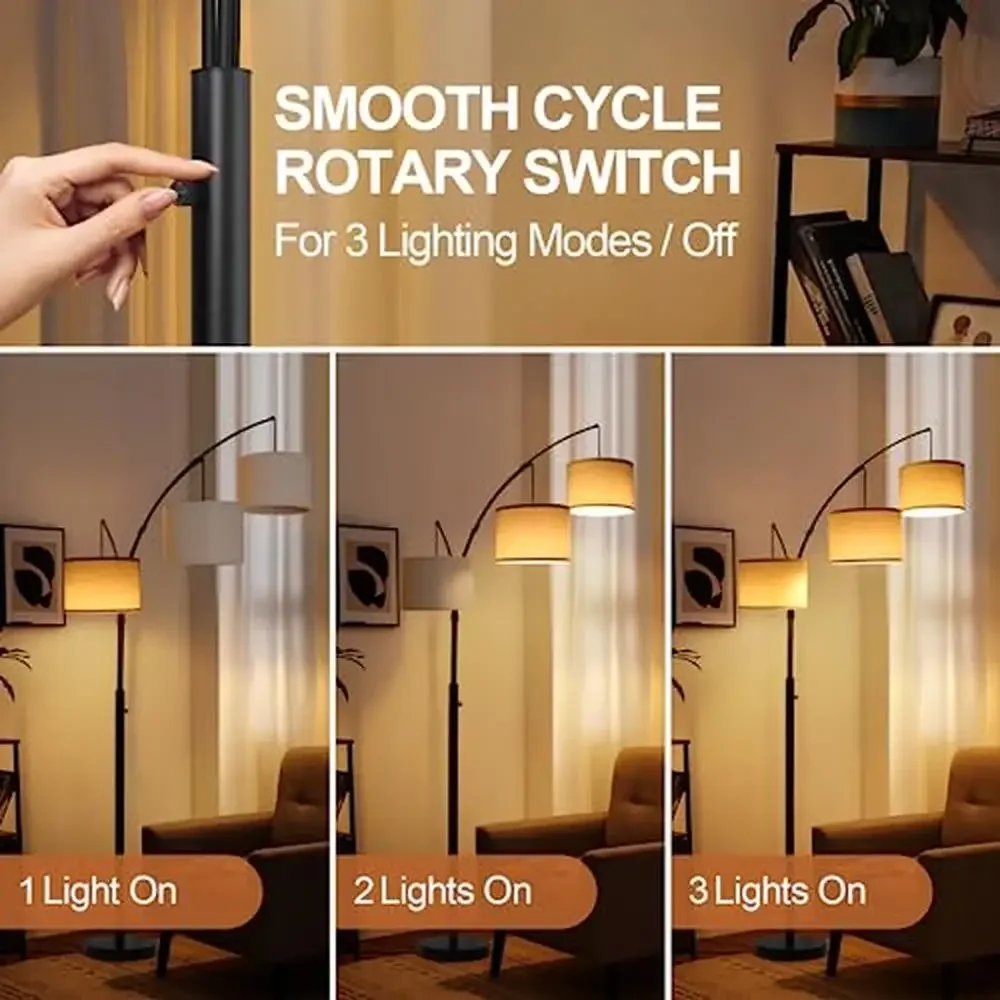
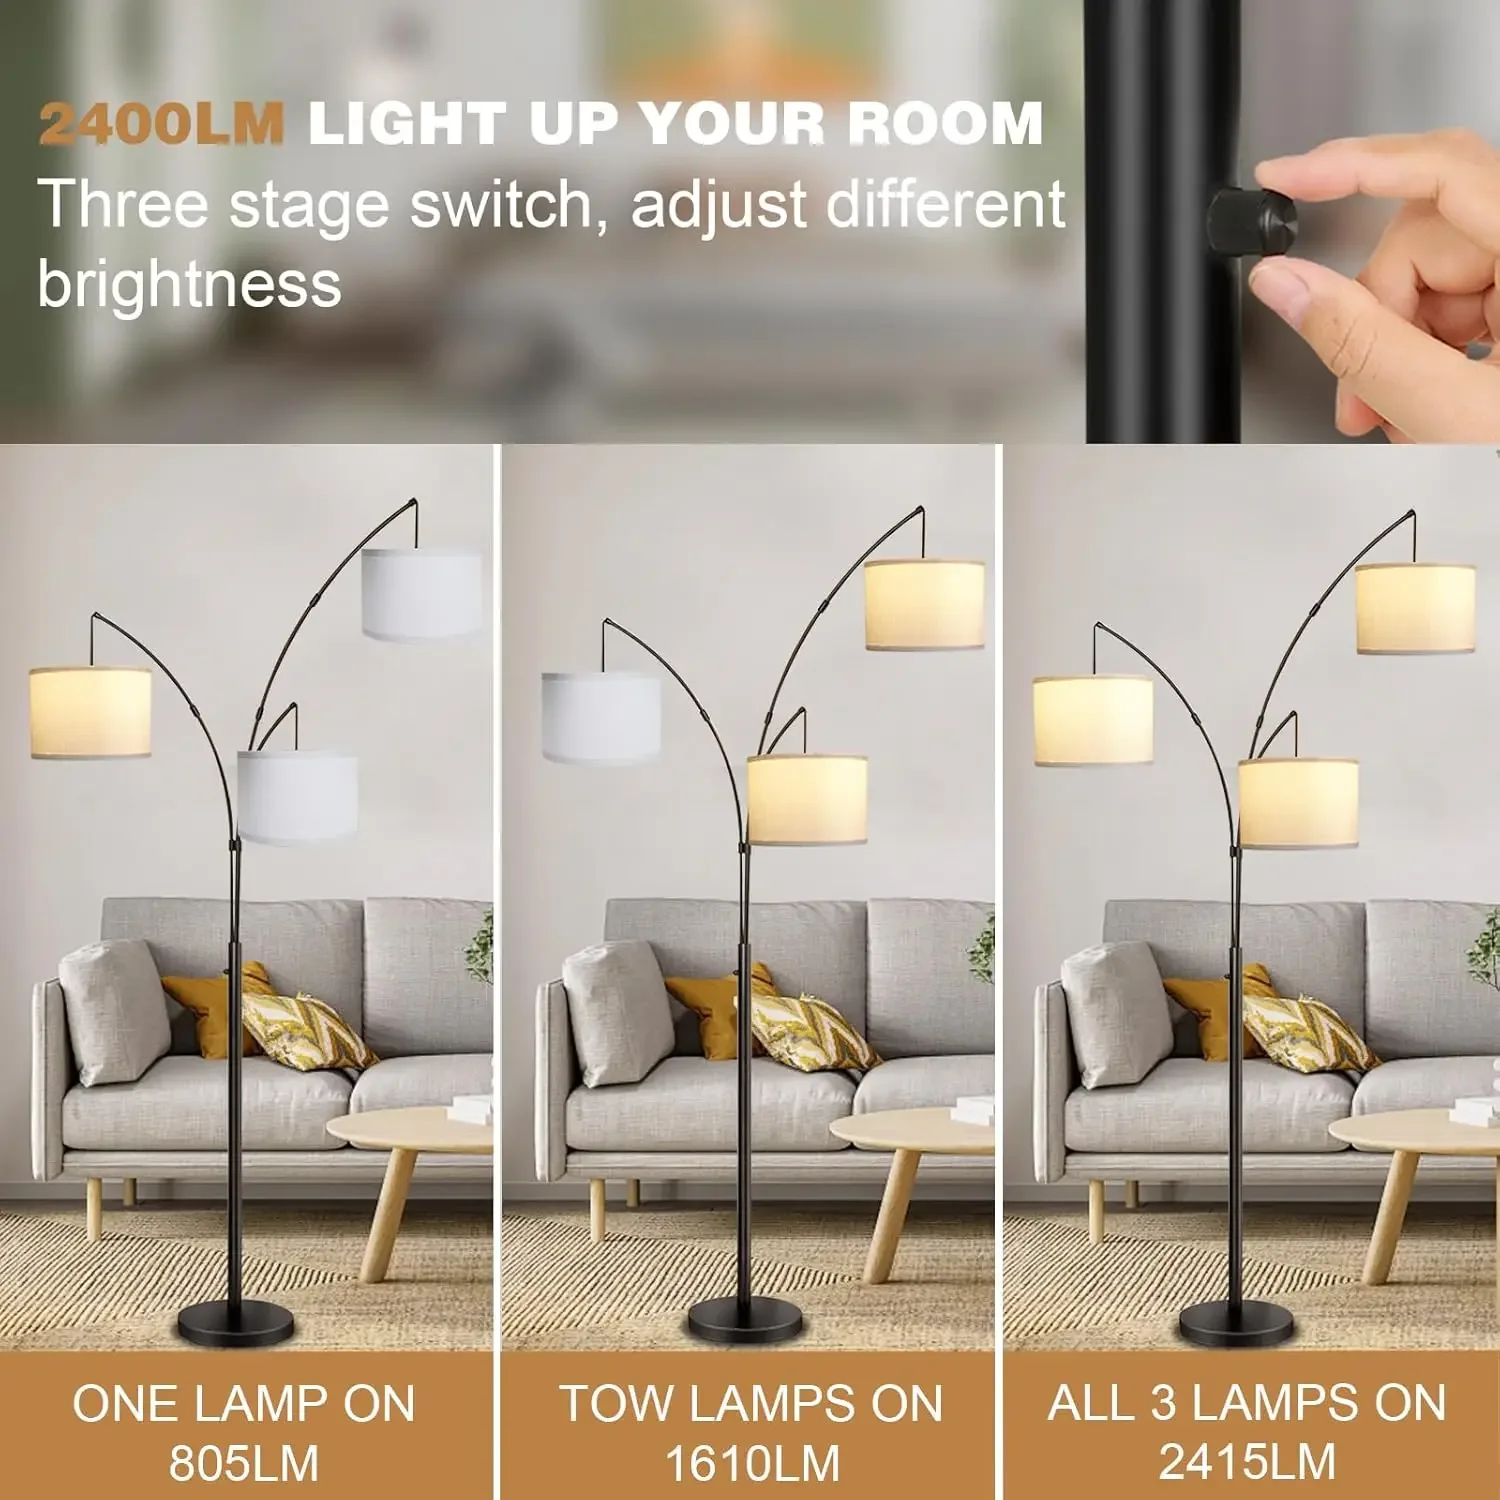
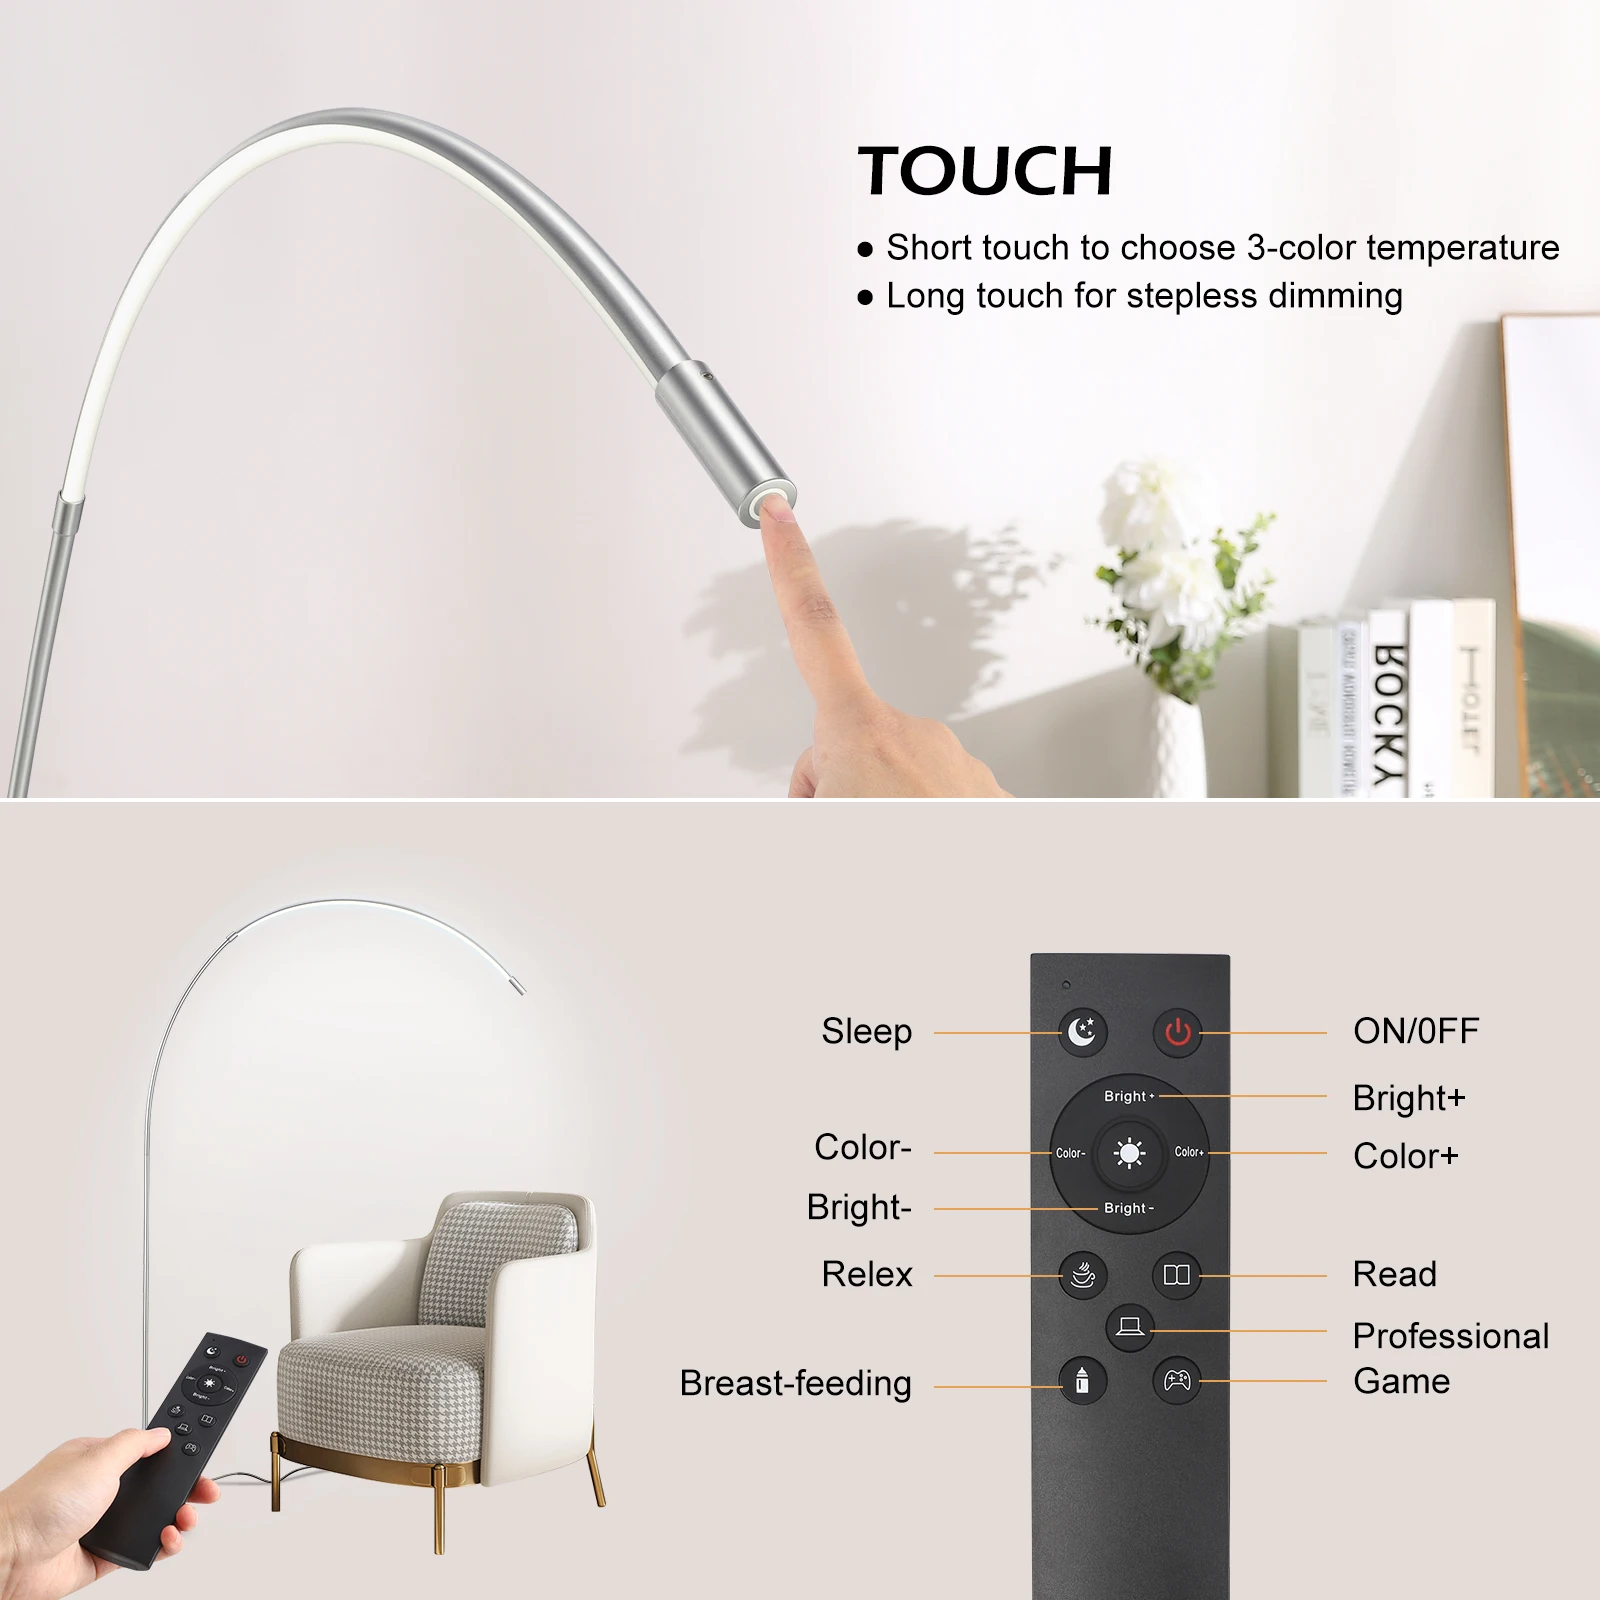
- If your lamp includes a dimmer switch, locate it and test its operation
- Ensure the polarized plug is oriented correctly (the wider prong goes into the wider slot)
- With the lamp fully assembled, plug it in and test all functions
For energy efficiency, LED bulbs are highly recommended as they produce less heat and use a fraction of the electricity of incandescent bulbs while lasting much longer. For example, a 9W LED provides similar light output to a 60W incandescent bulb.
For specialized lighting control, dimmable arc floor lamps offer adjustable brightness levels that require proper electrical connection and compatible bulbs to function correctly.
Final Positioning and Stability Testing
Once assembled, properly positioning your arc lamp ensures both safety and optimal lighting:
- Determine the ideal location based on what you’ll be illuminating (reading area, conversation space, artwork)
- Position the base on a flat, stable surface
- Orient the arc to extend over your target area
Maintain adequate clearance:
– At least 18-24 inches from walls
– Away from curtains and other flammable materials
– Clear of high-traffic walking pathsConduct a thorough stability test:
– Gently push the base from different angles
– Check that the lamp returns to its balanced position
– Verify all connections remain tightMake any necessary adjustments to improve stability:
– Reposition on a more level surface if needed
– Tighten any loose connections
– Adjust counterweights if your model has this feature
Different flooring surfaces affect stability—carpets may require additional adjustment compared to hard floors. The substantial weight of the base helps counterbalance the extended arm, but proper positioning is still essential.
Understanding the perfect arc floor lamp height for your specific space can help you maximize both the functional and aesthetic benefits of your new lighting fixture.
Troubleshooting Common Assembly Problems
Even with careful assembly, you might encounter these common issues and their solutions:
Wobbly Base or Connections
– Problem: Lamp feels unstable or rocks slightly
– Solution: Double-check that all connections are fully tightened and that the base is on a completely flat surface
Lamp Won’t Stand Straight
– Problem: The vertical pole leans to one side
– Solution: Verify the base connection is properly aligned and fully tightened; check floor levelness
Arc Arm Droops or Won’t Stay Positioned
– Problem: The arm gradually lowers from its set position
– Solution: Tighten the joint connecting the arm to the main pole; check for any damaged components
Light Doesn’t Work
– Problem: Bulb doesn’t illuminate when switched on
– Solution: Check bulb installation, test with a known working bulb, verify all electrical connections, and inspect the cord for damage
Parts Don’t Fit Together
– Problem: Components don’t align or connect properly
– Solution: Never force parts; double-check the instruction manual for correct orientation, and contact customer service if pieces appear defective
Shade Sits Crooked
– Problem: Lampshade isn’t level or straight
– Solution: Adjust the shade mounting hardware and verify the arc arm is properly balanced
Understanding what makes arc floor lamps good quality fixtures can help you identify potential issues during assembly and ensure you’re getting the best performance from your lamp.
Care and Maintenance of Your Arc Floor Lamp
Proper maintenance ensures your arc floor lamp remains beautiful and functional for years:
- Cleaning Different Materials:
- Metal parts: Dust regularly with a soft cloth; use mild metal cleaner for fingerprints or smudges
- Fabric shades: Vacuum gently with a brush attachment; spot clean with appropriate fabric cleaner
- Glass components: Clean with glass cleaner and lint-free cloth
Marble or stone bases: Use only cleaners specifically designed for natural stone
Regular Maintenance:
- Check all connections for tightness every 3 months
- Inspect the electrical cord for any wear or damage
- Clean dust from all surfaces regularly to prevent buildup
- Test any adjustment mechanisms to ensure smooth operation
Replace bulbs promptly when they burn out
When Adjusting Your Lamp:
- Always support the weight of the arc arm when making adjustments
- Avoid over-tightening adjustment knobs which can strip threads
- Make height or angle changes with gentle, controlled movements

Adjustable Arc Floor Lamp, Bronze Arc Floor Lamp
Price range: $440.95 through $558.52 Select options This product has multiple variants. The options may be chosen on the product page

Brass Arc Floor Lamp, Contemporary Arc Floor Lamp, LED Arc Floor Lamp
Price range: $490.72 through $522.04 Select options This product has multiple variants. The options may be chosen on the product page

Chrome Arc Floor Lamp, LED Arc Floor Lamp
Price range: $304.95 through $1,210.40 Select options This product has multiple variants. The options may be chosen on the product page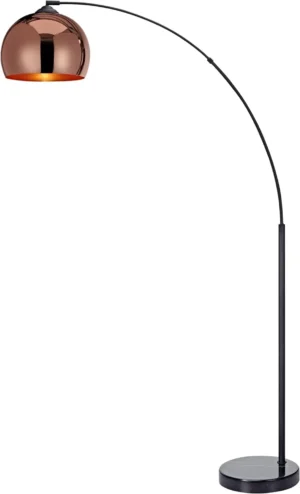

Contemporary Arc Floor Lamp, Large Arc Floor Lamp, Marble Base Arc Floor Lamp
$224.94 Select options This product has multiple variants. The options may be chosen on the product page
LED Arc Floor Lamp, Rattan Arc Floor Lamp
$313.58 Select options This product has multiple variants. The options may be chosen on the product page
 $1,003.85 Select options This product has multiple variants. The options may be chosen on the product page
Regular maintenance not only preserves the appearance of your lamp but also extends its functional lifespan and ensures continued safe operation.
Design Tips: Optimal Placement in Your Space
Your newly assembled arc floor lamp can become a focal point in your interior design with thoughtful placement:
Position your arc lamp where it serves both functional and aesthetic purposes—typically behind sofas, over reading chairs, or adjacent to dining areas. The curved arm allows the light to extend 3-5 feet from the base, illuminating specific areas without requiring overhead fixtures or table space.
When positioning your lamp, consider these design principles:
- Create balance by placing the substantial base opposite to other visually heavy furniture
- Use the directional light to highlight artwork, plants, or architectural features
- Adjust the height to complement your seating arrangements—lower for intimate settings, higher for general room illumination
- Consider the lamp’s finish and style in relation to your existing decor—contrast can create visual interest
The adjustable nature of many arc lamps allows you to change the lighting angle and coverage as needed for different activities or times of day. For specific room applications, exploring best arc lamps for living rooms can provide inspiration tailored to that particular space.
Safety Reminders for Long-Term Use
To ensure ongoing safety with your arc floor lamp:
- Always turn off and unplug the lamp before changing bulbs or cleaning
- Never exceed the maximum recommended bulb wattage
- Keep the lamp away from water sources and high humidity areas
- Ensure the electrical cord isn’t positioned where it creates a tripping hazard
- Periodically check all connections for stability, especially after moving the lamp
- Keep adjustable components properly tightened to prevent unexpected movement
- Be mindful of children and pets who might pull on the cord or bump into the lamp
- Replace any damaged electrical components immediately rather than attempting repairs
Watch for warning signs that require attention:
– Flickering lights (beyond normal bulb end-of-life behavior)
– Unusual noises when adjusting the lamp
– Visible wear on the electrical cord
– Loosening of structural connections
– Damage to the weighted base that might compromise stability
Following these safety guidelines ensures your beautiful arc floor lamp remains not just an elegant design element but also a safe addition to your home for years to come.