
Understanding Why Floor Lamps Become Unstable
Floor lamps add both functional lighting and stylish design elements to any room, but an unstable lamp can quickly become a frustrating hazard. When floor lamps wobble or tip easily, they create safety concerns that go beyond mere annoyance – they can lead to damage to the lamp itself, nearby furniture, or even cause injury if they fall.
Understanding what causes instability is the first step toward creating a lasting solution. Several common factors contribute to unstable floor lamps:
- Insufficient base support: Many modern lamp designs prioritize aesthetics over stability, resulting in bases that are too small or lightweight to adequately support the lamp’s height.
- Surface challenges: Uneven flooring, transitions between flooring types, or soft carpet can all undermine even well-designed lamps.
- Structural weaknesses: Loose connections between the base, pole sections, and lamp head create wobbling that worsens over time.
- Component damage: Bent poles, cracked bases, or worn connection points compromise the lamp’s structural integrity.
- Design imbalance: Top-heavy designs, particularly with comprehensive arc lamp base structures, create leverage that works against stability.
These issues become particularly problematic with taller floor lamps, especially those with adjustable components or extended arms that shift the center of gravity when positioned. The good news is that with the right approach, almost any unstable lamp can be stabilized effectively.
Essential Tools and Materials for Lamp Stabilization
Before attempting to stabilize your floor lamp, gathering the right tools and materials will make the process smoother and more effective. The specific items you’ll need depend on which stabilization method you choose, but having these basics on hand will prepare you for most approaches.
Basic Tools:
- Screwdriver set (flathead and Phillips head)
- Level tool (to check alignment)
- Measuring tape
- Adjustable wrench
- Pliers (needle-nose and regular)
Weighting Materials:
- Sand (clean, dry play sand works well)
- Small decorative stones or pebbles
- Cast iron weights (disc or donut-shaped)
- Steel shot or BBs (for maximum weight in small spaces)
Leveling Materials:
- Furniture shims (plastic or wood)
- Self-adhesive felt pads of various thicknesses
- Adjustable furniture feet or levelers
- Cork or rubber discs
Securing Materials:
- Double-sided mounting tape (heavy-duty)
- Non-slip rubber mats or pads
- Furniture anchors or straps
- Hook-and-loop fasteners (industrial strength)
Repair Materials:
- Thread-locking compound (for loose screws)
- Multi-surface adhesive
- Epoxy putty (for base repairs)
- Heat-shrink tubing (for reinforcing connections)
Different lamp styles require different approaches to stabilization. For instance, stabilizing arc floor lamp bases often requires additional consideration of counterbalancing the extended arm. Having a variety of materials on hand allows you to try multiple solutions if needed.
Method 1: Adding Weight to Your Lamp Base
Adding weight to your floor lamp base is often the simplest and most effective way to improve stability. This method works especially well for lamps that are structurally sound but too lightweight to resist tipping.
The physics behind this approach is straightforward: increasing the weight at the bottom lowers the lamp’s center of gravity and creates greater resistance against tipping forces. For optimal stability, the weight should be added as low as possible in the base structure.
How much weight you need depends on several factors:
– Lamp height (taller lamps require more weight)
– Base diameter (narrower bases need more weight than wider ones)
– Design style (arc lamps and adjustable lamps typically need more weight)
As a general guideline, standard pole lamps around 5-6 feet tall usually benefit from adding 3-5 pounds of weight, while taller arc lamps with extended arms may require 7-10 pounds or more. The goal is to make the lamp resistant to normal bumps and minor movements without making it unnecessarily heavy to move when needed.
When adding significant weight, always check that the base construction can support the additional load. Some decorative or lightweight plastic bases may crack under excessive weight. For specialized floor lamps like arc styles, weighted bases designed specifically for arc lamps provide balanced support for their unique design requirements.
Filling Hollow Lamp Bases
Many floor lamps feature hollow bases that can be filled to add substantial weight without changing the lamp’s appearance. This hidden solution maintains the lamp’s aesthetic while dramatically improving stability.
Before beginning, determine if your lamp base is appropriate for filling:
- Tap the base lightly – a hollow sound indicates filling potential
- Look for seams or access points where the base can be opened
- Check manufacturer information, as some bases are designed to be filled
Step-by-Step Filling Process:
- Unplug the lamp and place it on a protected work surface
- Disassemble the lamp carefully, separating the base from the pole (usually by unscrewing)
- Check inside the base for any electrical components that must remain dry
Prepare your filling material based on your needs:
– Sand: Inexpensive and effective, about 100 pounds per cubic foot
– Decorative stones: Attractive if visible, approximately 80-100 pounds per cubic foot
– Metal BBs or shot: Maximum weight (200+ pounds per cubic foot) but costly
– Plaster or concrete: Permanent solution with excellent weightFill the base to the appropriate level (usually 80-90% full to prevent overflow)
- Seal the filling port with appropriate material (original plug, silicone sealant, or tape)
- Reassemble the lamp, ensuring all connections are secure
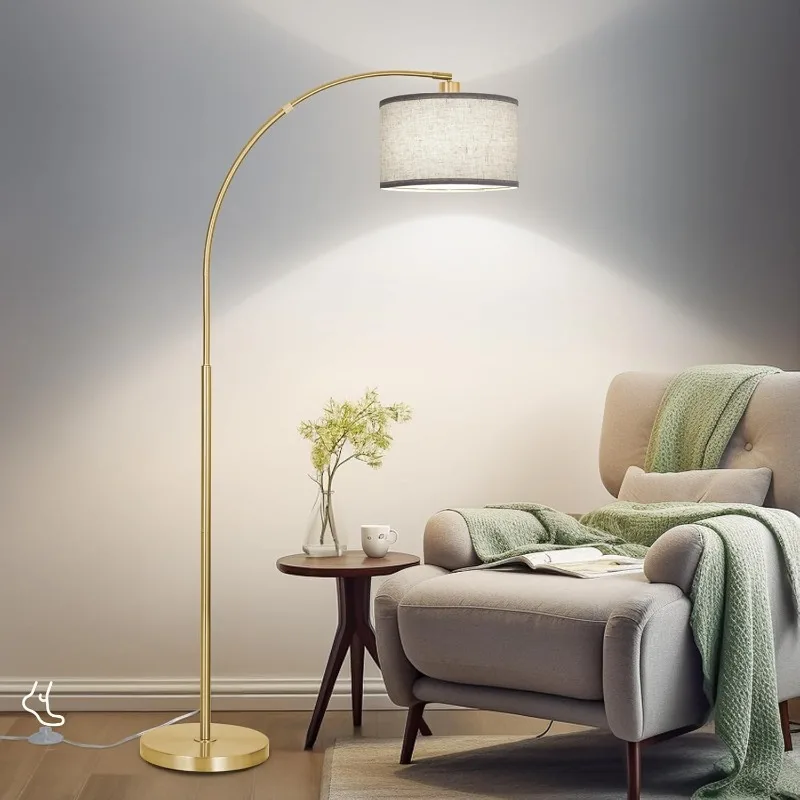
For lamps with permanently sealed bases, consider purchasing marble base arc floor lamps that come with naturally heavy, stable bases built-in. These provide excellent stability without modification and often feature elegant designs that enhance your decor.
External Weighting Solutions
When filling the lamp base isn’t possible or doesn’t provide enough stability, external weights offer an effective alternative. These solutions can be implemented without disassembling the lamp and are easily adjustable as needed.
Commercially Available Options:
– Donut-shaped lamp weights that fit around the lamp pole
– Weighted base plates that sit under the existing lamp base
– Decorative weighted collars designed to complement lamp styles
DIY External Weight Solutions:
– Create a custom fabric “weight bag” filled with sand that wraps around the base
– Use decorative planter pots placed over the lamp base and filled with stones
– Attach exercise weights to the base with strong adhesive hook-and-loop fasteners
– Conceal barbell weights under a decorative base cover or small tablecloth
When adding external weights, distribution is key. The weight should be centered around the lamp’s pole and spread as widely as possible for maximum stability. For aesthetic purposes, external weights can be:
- Painted to match the lamp base
- Covered with decorative fabric
- Incorporated into a small display area around the lamp
- Hidden by a lamp base cover designed for this purpose
External weighting is particularly useful for lamps with unusual base shapes or those where internal modifications would void warranties. The flexibility of this approach allows you to add exactly the right amount of weight for your specific lamp and location.
Method 2: Addressing Uneven Surfaces
Even the most stable lamp design can wobble if placed on an uneven surface. Floor irregularities – whether obvious or subtle – create instability that’s easily remedied with the right approach.
To identify surface issues:
1. Place a level on the floor in multiple directions where the lamp will stand
2. Check for rocking when the lamp base is placed in different positions
3. Look for transitions between flooring materials that create height differences
4. Test if the surface compresses under pressure (common with carpet or area rugs)
Depending on your specific flooring type, different solutions are most effective:
For Hard Floors (Wood, Tile, Vinyl):
– Furniture shims placed under specific points of the base to create level support
– Self-adhesive felt pads of varying thicknesses to compensate for slight irregularities
– Adjustable leveling feet that can be twisted to the exact height needed
– Silicone or rubber discs that both level and provide grip
For Carpeted Surfaces:
– Rigid distribution plates that prevent sinking into carpet pile
– Carpet casters or cups designed to create stable platforms on soft surfaces
– Plywood or acrylic discs cut slightly larger than the lamp base
For particularly challenging floor conditions, a combination approach works best. Techniques that keep floor lamps from leaning often involve both addressing the surface and modifying the lamp’s weight distribution for optimal stability.
Creating a Stable Foundation on Carpet
Carpet presents unique challenges for floor lamp stability. The soft, compressible surface allows lamps to sink unevenly, while varying pile heights create natural imbalances. Additionally, carpets aren’t static surfaces – they shift and compress with traffic patterns over time.
To create a truly stable foundation on carpet:
Use a rigid distribution plate:
– Cut a circle of 1/4” plywood or acrylic slightly larger than your lamp base
– Sand and finish the edges for safety and appearance
– Place this under your lamp base to distribute weight evenlyImplement carpet gripping:
– Carpet grip pads (rubber mesh material) placed between the distribution plate and carpet prevent shifting
– Specialty furniture cups with teeth gently grip carpet fibers without damage
– For low-pile carpets, silicone-backed non-slip pads provide excellent gripAddress compression issues:
– Pre-compress carpet by placing weight where the lamp will stand for 24-48 hours
– Use firmer distribution plates for plush or high-pile carpets
– Consider adding furniture glides that distribute weight across a wider area
The most effective carpet solution combines a rigid base for distribution with proper gripping mechanisms underneath. This prevents both the rocking caused by uneven compression and the sliding that occurs when carpet fibers shift under the lamp’s weight.
Method 3: Securing Your Lamp to Prevent Tipping
For situations where adding weight or addressing floor surfaces isn’t sufficient, securing your floor lamp provides an additional level of stability. This approach is especially valuable in homes with active children, pets, or in areas with high traffic where bumping is likely.
When to Consider Securing Methods:
– When the lamp is placed in high-traffic areas
– If you have young children or pets that might pull on the lamp
– For exceptionally tall or top-heavy lamp designs
– In regions prone to earthquakes or vibrations
– When the lamp position makes other stabilization methods inadequate
Securing Options by Effectiveness:
Furniture Anchors and Wall Straps
– Highest security level
– Requires installation (wall hardware)
– Nearly invisible when properly installed
– Can prevent tipping even with significant forceNon-slip Mats and Adhesive Solutions
– Moderate security level
– No installation required
– Completely hidden beneath the lamp
– Prevents sliding and minor bumpsWeighted Base Plates with Non-slip Surfaces
– Lower security level but easy implementation
– Combines weight with grip
– Portable and adjustable
– Good for temporary locations
The ideal securing method balances your need for stability with how frequently you might need to move the lamp. For permanent lamp locations, wall-anchoring provides superior protection, while adhesive solutions offer flexibility for occasional repositioning. For specialized guidance on securing particularly challenging designs, consider how to secure tall floor lamps with their unique stability requirements.
Using Anti-Tip Anchors and Straps
Anti-tip anchors provide the highest level of security for floor lamps, particularly important for households with children, pets, or in earthquake-prone areas. While installation requires a few more steps than other methods, the results offer unmatched stability.
Step-by-Step Installation:
Select the appropriate anchor type:
– For drywall: Toggle bolts or specialized drywall anchors
– For masonry: Concrete screws or expansion anchors
– For wood walls: Wood screws directly into studsPosition your lamp in its final location
– Place the lamp exactly where you want it
– Ensure it’s adjusted for optimal lighting
– Check that it’s close enough to a wall for discreet anchoringInstall the wall component:
– Mark the wall at the appropriate height (typically mid-way up the lamp pole)
– Install the wall anchor according to manufacturer instructions
– Ensure the anchor is secure by testing with gentle pressureAttach the lamp component:
– Connect the strap or cable to the lamp pole
– Use protective material between metal components if needed
– Adjust strap length for slight tension without pulling the lampTest and adjust:
– Gently push the lamp in different directions to test resistance
– Ensure the anchor allows minimal movement but doesn’t strain connections
– Verify the strap or cable remains hidden from casual view
For renters concerned about wall damage, removable options include:
– Command strip-based anchor systems rated for appropriate weight
– Pressure-mounted poles that brace between floor and ceiling
– Heavy furniture positioning to block potential tipping directions
Proper positioning of arc floor lamps near walls or furniture can also reduce the visibility of security straps while maintaining the lamp’s design impact.
Method 4: Fixing Structural Issues
Sometimes lamp instability stems from structural problems rather than insufficient weight or surface issues. Addressing these underlying mechanical problems often resolves wobbling without requiring additional stabilization methods.
Common Structural Issues to Inspect:
Loose Connections
– Pole sections that haven’t been fully tightened
– Base-to-pole connections with worn threads
– Lampshade mounts that have loosened over time
– Set screws that need tightening or replacementComponent Alignment Problems
– Bent poles or arms that create imbalance
– Misaligned threaded components causing wobbling
– Warped bases that don’t sit flat
– Improperly assembled sectionsMaterial Failures
– Cracked plastic components at stress points
– Split wooden elements affecting structural integrity
– Metal fatigue at connection points
– Deteriorated adhesive on glued components
To systematically diagnose structural issues:
- Run your hand along the entire lamp while it’s standing, feeling for movement
- Gently twist each connection point to check for looseness
- Examine the lamp from multiple angles looking for bends or misalignment
- Check the base for flatness using a level
Most structural issues can be repaired with basic tools and appropriate adhesives. However, if a lamp shows signs of electrical damage (frayed wires, scorch marks) or major structural failure, professional repair or replacement is the safest option.
Repairing and Reinforcing Lamp Bases
The base is the foundation of your floor lamp’s stability, and repairing damage here can resolve many balance issues. Different base materials require specific repair approaches:
Wooden Base Repairs:
– For splits or cracks: Wood glue worked into the crack, clamped until dry
– For loose joints: Disassemble, clean old glue, reapply wood glue and clamp
– For warping: Minor warping can be corrected with strategic shimming
– For severe damage: Reinforcement plates attached to the underside of the base
Metal Base Repairs:
– For dented bases: Gentle reshaping with rubber mallet or wooden blocks
– For separating seams: Metal epoxy applied to clean surfaces
– For loose weights: Reattach internal weights with appropriate adhesive
– For bent components: Careful straightening using leverage techniques
Ceramic or Glass Base Repairs:
– For hairline cracks: Clear epoxy designed for ceramics
– For loose components: Silicone adhesive allows for slight movement without breaking
– For chips: Fill with matching epoxy putty and sand smooth when dry
– For major cracks: Consider a decorative repair using the kintsugi technique
Plastic Base Repairs:
– For stress cracks: Plastic epoxy or ABS cement for clean surfaces
– For brittle plastic: Reinforcement with fiberglass tape and epoxy
– For separating sections: Appropriate plastic adhesive and clamping
– For warping: Gentle heat correction (requires care to avoid further damage)
When determining if a base is worth repairing, consider:
1. The lamp’s value (sentimental, financial, or aesthetic)
2. The extent of damage relative to the overall structure
3. Whether repairs will provide lasting stability
4. If reinforcement can prevent future issues
For bases with extensive damage, specialized repair shops can sometimes fabricate replacement parts or reinforce existing components beyond DIY capabilities.
Stabilizing Specialized Floor Lamp Types
Different lamp styles present unique stability challenges based on their design, weight distribution, and typical use. Understanding these differences helps you choose the most effective stabilization approach.
Arc Floor Lamps
Arc lamps, with their extended horizontal reach, create substantial leverage that works against stability. Their center of gravity shifts dramatically based on the arc’s position, requiring specialized understanding of arc lamp base types and how they manage these forces. Typically, arc lamps need heavier bases or additional securing methods compared to standard pole lamps.
Multi-Arm or Tree-Style Lamps
These lamps distribute weight across multiple extending arms, creating potential imbalance as adjustments are made. The key stability challenge is maintaining balance when arms are positioned asymmetrically. Solutions often involve central weighting and wider bases.
Tripod or Architectural Lamps
With their three-point base design, these lamps offer inherent stability if properly set up. The main challenge comes when placed on uneven surfaces that undermine the balanced tripod design. Surface corrections and ensuring equal leg positioning are essential.
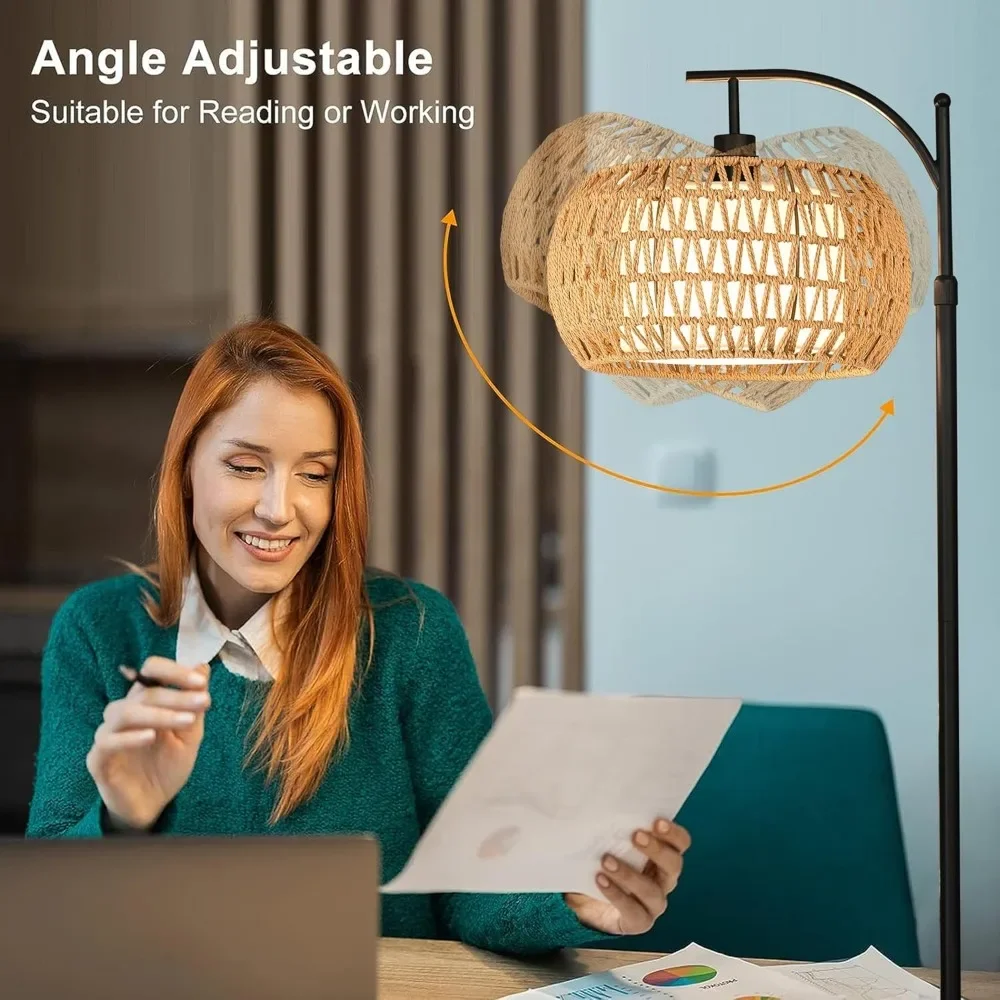
Adjustable or Articulating Lamps
These versatile lamps change their center of gravity whenever adjusted. The joints and adjustment mechanisms can also loosen over time, adding to instability. Regular tightening of components and positioning counterweights to balance extended sections help maintain stability.
Arc Lamp Stability Solutions
Arc floor lamps require specialized stability approaches due to their unique design. The extended arc creates a leverage effect that dramatically increases tipping potential, even with seemingly adequate base weight.
Understanding Arc Lamp Physics:
The weight of the lamp head acts on the extended arm like a lever, multiplying the force applied to the base. For every foot of horizontal extension, the counterbalance needed at the base increases significantly. This is why many arc lamps have bases that seem disproportionately heavy or large.
Specialized Arc Lamp Stabilization Techniques:
Strategic Counterweighting:
– Add weight directly opposite the direction of the arc
– Use asymmetrical weight distribution in the base
– Consider hidden counterweights attached to the vertical polePositioning Strategies:
– Place the lamp so the arc extends over low-traffic areas
– Position heavy furniture near the base on the opposite side of the arc
– Use corner placements where two walls can help prevent tippingBase Enhancement:
– Create custom base extenders that increase the footprint in the arc direction
– Use specially designed arc lamp weights that account for directional stress
– Consider floor-mounting options for permanent installationsArc Adjustment:
– Minimize the horizontal reach when stability is a concern
– Adjust height to find the optimal balance point
– For adjustable arc floor lamps, find the most stable configuration for your space
Understanding the geometric principles of leverage helps in creating effective solutions. A well-stabilized arc lamp requires approximately 1.5-2 times more base weight than a traditional pole lamp of similar height due to the mechanical disadvantage created by the extended arm.

Contemporary Arc Floor Lamp, Large Arc Floor Lamp, Oversized Arched Floor Lamp
$460.63 Select options This product has multiple variants. The options may be chosen on the product page

Adjustable Arc Floor Lamp, Bronze Arc Floor Lamp
Price range: $440.95 through $558.52 Select options This product has multiple variants. The options may be chosen on the product page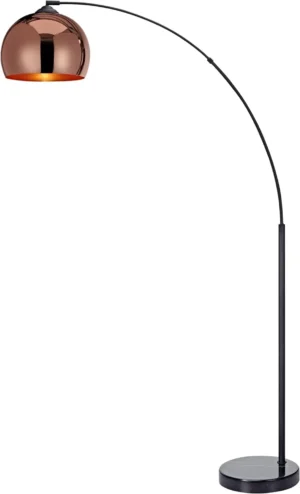

Contemporary Arc Floor Lamp, Large Arc Floor Lamp, Marble Base Arc Floor Lamp
$224.94 Select options This product has multiple variants. The options may be chosen on the product page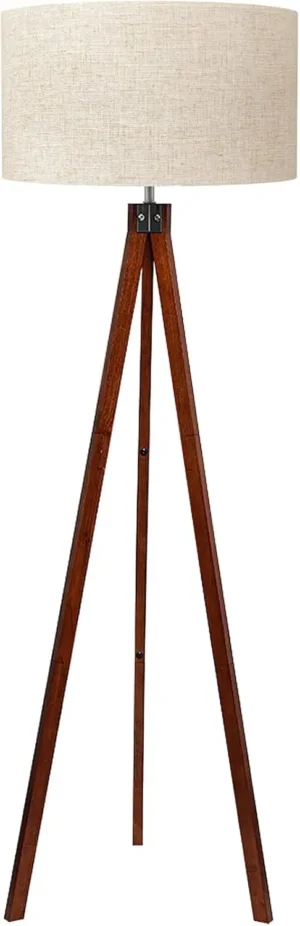

Mid-Century Arc Floor Lamp, Wood Arc Floor Lamp
$230.86 Select options This product has multiple variants. The options may be chosen on the product page
Vintage Arc Floor Lamp, Wood Arc Floor Lamp
Price range: $603.87 through $1,346.09 Select options This product has multiple variants. The options may be chosen on the product page
 $1,003.85 Select options This product has multiple variants. The options may be chosen on the product page
Preventative Measures and Long-Term Stability
Maintaining lamp stability over time requires ongoing attention and preventative care. These measures help you avoid stability problems before they develop and ensure your solutions remain effective long-term.
Regular Maintenance Schedule:
– Monthly quick check of all connection points for tightness
– Quarterly thorough inspection of base stability and weight distribution
– Seasonal reassessment when changing from heating to cooling (or vice versa)
– Immediate attention to any new wobbling or movement
Early Warning Signs to Monitor:
– Slight rocking when the lamp is touched
– Gradual leaning that wasn’t previously present
– New sounds (creaking, clicking) when the lamp is adjusted
– Visible changes to connection points or base alignment
Optimal Placement Strategies:
– Position lamps away from high-traffic pathways
– Consider typical movement patterns of children and pets
– Avoid placing near doors that might bump the lamp when opened
– Be mindful of placement near windows where curtain movement might affect stability
Environmental Considerations:
– Monitor how seasonal humidity changes affect wooden components
– Be aware of how heating vents might create uneven temperature distribution
– Consider how flooring changes over time (carpet compression, wood expansion)
For the most reliable long-term stability, large oversized arc floor lamps with substantial built-in bases often require less maintenance and fewer stability interventions. Their intentionally heavy bases provide inherent stability against everyday bumps and movements.
When to Replace Rather Than Repair
While most stability issues can be resolved, sometimes replacement is the safer, more cost-effective option. Understanding when to make this decision helps prevent wasted effort and potential safety hazards.
Signs That Replacement May Be Necessary:
Structural Integrity Issues:
– Multiple repair attempts have failed to create lasting stability
– The base material has degraded beyond reliable repair
– Metal components show significant corrosion or fatigue
– Wooden elements have split along grain lines in critical areasDesign Flaws That Cannot Be Overcome:
– The base is fundamentally too small for the lamp’s height
– Top-heavy design creates persistent instability despite interventions
– Connection systems have inherent weaknesses that continue to failCost-Benefit Considerations:
– Repairs and stabilization cost more than 50% of replacement
– Parts needed are no longer available or require custom fabrication
– Time and effort for ongoing repairs exceed reasonable maintenanceSafety Concerns:
– Electrical components are compromised by stabilization attempts
– The lamp has fallen multiple times, potentially weakening internal structures
– Repairs cannot guarantee safety around children or pets
When shopping for a replacement lamp, prioritize models with:
– Wide, heavy bases proportional to the lamp’s height
– Quality materials at connection points
– Positive reviews specifically mentioning stability
– Design features that enhance balance, like wood arc floor lamps with their naturally lower center of gravity
Considering sustainability, explore whether components from your current lamp can be repurposed or properly recycled before disposal.

FAQs About Floor Lamp Stabilization
Can I use water to weight down my lamp base?
Water is not recommended for weighting lamp bases. While it’s readily available and heavy, it poses several risks: leakage could create electrical hazards, evaporation reduces effectiveness over time, and freezing/expansion in unheated spaces could crack the base. Dry materials like sand or metal weights provide safer, more reliable alternatives.
How much weight do I need based on my lamp’s height?
As a general guideline, add approximately 1-2 pounds of weight for each foot of lamp height for standard designs. For arc lamps or adjustable styles, increase this to 2-3 pounds per foot. A 6-foot traditional floor lamp typically needs 6-12 pounds of added weight for good stability, while a 6-foot arc lamp might require 12-18 pounds.
Will adding weight damage my lamp or floor?
When done properly, adding weight shouldn’t damage your lamp if you stay within the structural limits of the base material. Distribute weight evenly to avoid stress points. For floors, always use protective padding between weighted bases and delicate flooring surfaces to prevent scratches or indentation, especially on hardwood or vinyl.
What if my lamp base is too small for internal weights?
For lamps with bases too small for internal weighting, consider wider external weight platforms that increase both weight and the stability footprint simultaneously. Donut-shaped weights that circle the pole or decorative base covers concealing weights offer alternatives without requiring internal modification.
Are there universal lamp stabilizers available commercially?
Yes, several universal stabilizing products exist, including weighted donuts that slip around lamp poles, non-slip grip pads with added weight, and adjustable anchor systems designed to work with multiple lamp styles. These products offer standardized solutions without custom modifications.
Can I effectively stabilize a lamp on extremely plush carpet?
Extremely plush carpet presents special challenges, but effective stabilization is possible by combining a rigid distribution plate (minimum 1/2 inch thick) that’s significantly wider than the lamp base with a carpet claw system underneath. For maximum stability, consider floor-to-ceiling tension rods as supplementary support for lamps on very soft surfaces.
Safety Considerations for Floor Lamp Stabilization
When improving your lamp’s stability, safety must remain the priority throughout the process. Following these guidelines helps prevent both immediate and long-term hazards.
Electrical Safety:
– Always unplug lamps completely before beginning any modification
– Keep all filling materials away from electrical components
– Never modify the lamp socket, wiring, or plug as part of stabilization
– After modifications, check for any wire pinching or stress before plugging in
– Consider having electrical components professionally inspected after significant modifications
Weight and Structural Concerns:
– Never exceed the design weight capacity of the lamp components
– Distribute added weight evenly to prevent stress concentrations
– Watch for signs of stress (cracking, bending) when adding significant weight
– Test stability incrementally rather than adding all weight at once
– Ensure all connections remain properly tightened after adding weight
Child and Pet Safety:
– Even stabilized lamps should be positioned away from play areas when possible
– Consider cord management solutions to prevent pulling hazards
– Choose non-toxic filling materials in case of accidental breakage
– Implement additional prevention measures for arc lamps tipping in homes with young children
Professional Assessment:
Seek professional help when:
– Electrical components show any damage or unusual operation
– The lamp has significant existing structural damage
– You’re uncertain about the lamp’s weight-bearing capacity
– The lamp is a valuable antique or collector’s item
With proper attention to these safety considerations, your stabilized lamp will provide both the illumination and peace of mind you desire from this important home accessory. Remember that the most beautiful lamp is one that remains upright and functional for years to come.